Playback |
Playing Back Videos |
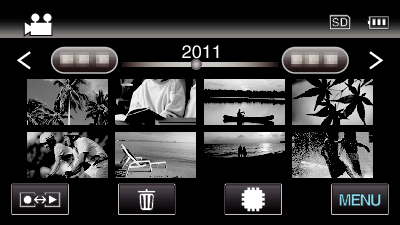
You can select and play back the recorded videos from an index screen (thumbnail display).
- 1
- 2
- 3
- 4

Select video mode.
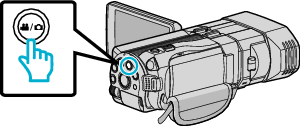
The video mode icon ![]() appears.
appears.

Tap  to select the playback mode.

Press the 3D button to select 3D or 2D mode.
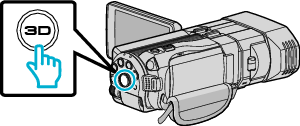
Images recorded in 3D mode and 2D mode are displayed on the index screen separately. Press the 3D button to switch to the desired mode for playback.
During 3D mode, “3D” is displayed on the LCD monitor.
During 2D mode, “2D” is displayed on the LCD monitor.

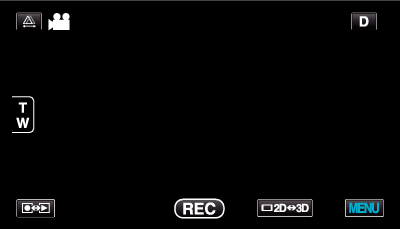
Tap on the file to start playback.
Tap ![]() /
/ ![]() to select the media for playback and change the index screen (thumbnail display).
to select the media for playback and change the index screen (thumbnail display).
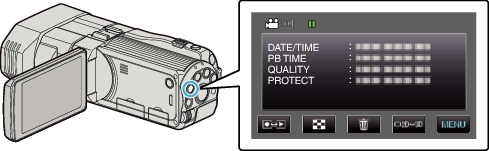
Tap ![]() to pause.
to pause.
Tap ![]() to return to the index screen.
to return to the index screen.
Memo
- Images recorded in 2D mode cannot be displayed as 3D images.
- 3D images may be played back when the 3D button lights up.
- Images recorded in 3D mode and 2D mode are displayed on the index screen separately. Press the 3D button to switch to the desired mode for playback.
- 3D images recorded in “MP4(MVC)” format and “AVCHD” format are displayed on the index screen separately.
Change the setting of 3D VIDEO REC FORMAT to the desired format for playback. - Scenes that are likely to cause motion sickness during 3D playback may be played back in stop-motion, but this is not a malfunction. To play back normally, set “3D MOTION RELIEF” to “OFF”.
For customers who completed the firmware update
- 3D images recorded in “MP4(MVC)” format, “ AVCHD 3D ” format and “AVCHD” format are displayed on the index screen separately.
Change the setting of 3D VIDEO REC FORMAT to the desired format for playback.
Caution
- To play back 3D images, refer also to “Precautions on Recording and Playing Back 3D Images”.
Operation Buttons for Video Playback
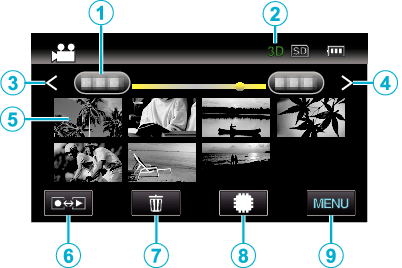
During Index Screen Display
| Display | Description | |
|---|---|---|
 |
Date |
Moves to the previous/next date |
 |
3D/2D Mode |
Displays the current playback mode of 3D or 2D. “3D” is displayed during 3D playback, while “2D” is displayed during 2D playback. |
 |
< |
Displays the previous index screen (thumbnail display) |
 |
> |
Displays the next index screen (thumbnail display) |
 |
Thumbnail (File) |
Tap on thumbnail - Starts playback |
 |
Recording/Playback Mode |
Switches between recording and playback modes. |
 |
|
Displays the index screen (thumbnail display) to perform deletion |
 |
|
Switches between the index screen of the built-in memory and SD card |
 |
MENU |
Displays the menu screen |
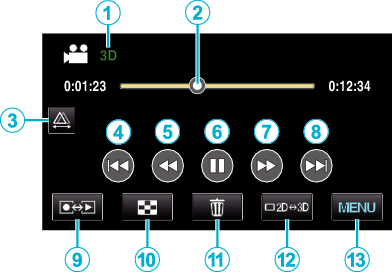
During Video Playback
| Display | Description | |
|---|---|---|
| |
3D/2D Mode |
Displays the current playback mode of 3D or 2D. “3D” is displayed during 3D playback, while “2D” is displayed during 2D playback. |
| |
Pointer |
Displays the current estimated playback position within the scene |
| |
|
Enables manual parallax adjustment |
| |
|
Returns to the beginning of the scene |
| |
|
Reverse search |
| |
|
Playback/pause |
| |
|
Forward search |
| |
|
Advances to the next video |
| |
Recording/Playback Mode |
Switches between recording and playback modes. |
 |
|
Stop (returns to index screen) |
 |
|
Displays the index screen (thumbnail display) to perform deletion |
 |
|
Switches between 3D and 2D modes. |
 |
MENU |
Displays the menu screen |
Memo
- Tap or drag on the operation area of the touch screen.
- Operations buttons on the touch screen disappear if the unit is not operated for about 5 seconds. Tap on the screen to display the operation buttons again.
- Operation buttons on the touch screen are displayed as long as there is contact with the effective operation area.
- You can search for a specific file by the recording date.
Caution
- Make a backup of important recorded data.
It is recommended to copy your important recorded data to a DVD or other recording media for storage.
JVC will not be responsible for any lost data.