No sound from both sides of the earphones

If no sound is heard from both sides of the earphones, following the steps below may solve the problem.
Follow the steps to check whether there is any abnormality with the sound output.
Insert the earphones into the charging case. Check that charging has started, and then remove from the charging case.
Select the state after checking
Thank you for using Troubleshooting Guide.
Check the state of the earphones.
Remove the earphones from the charging case and check the status of the indicators.
The earphones are properly connected to the device.
Check the app settings and volume.
Apps and Volume Control on the Connected Device
-
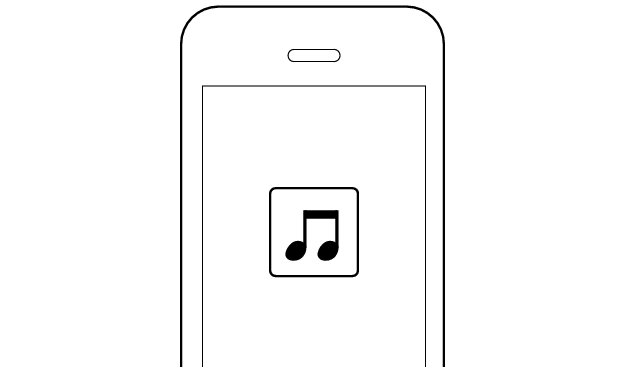
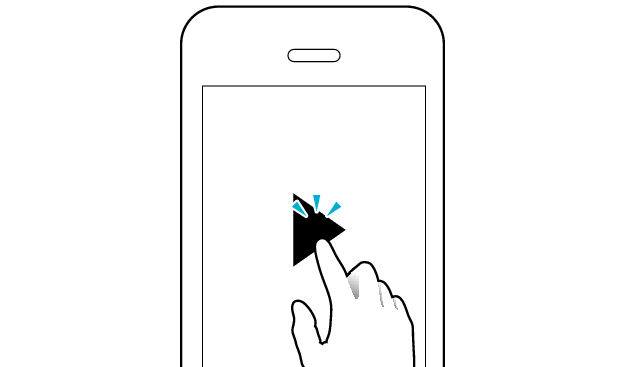
Open an app and play
-
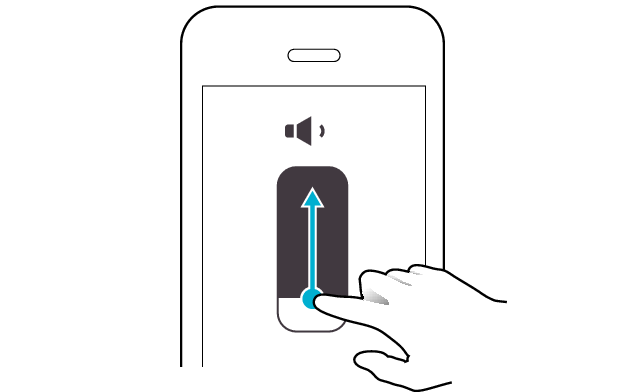
Adjust the volume
Select the state after checking
Thank you for using Troubleshooting Guide.
Initializing the earphones and re-establishing the connection may help to solve the problem.
Follow the steps below to check whether there is any abnormality with the sound output.
Initializing
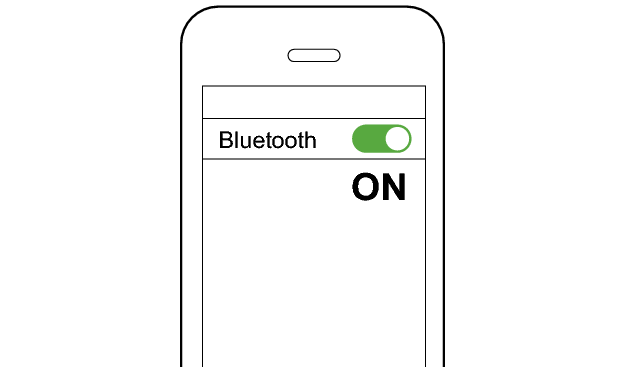
First of all, go to the Bluetooth settings of the device to be connected and delete the information of this unit that is registered on it.
Charge the charging case beforehand.
Remove the earphones once if they are inserted into the charging case.
Follow the steps below to initialize the settings of both L and R earphones.
Initialize the L earphone.
-
Insert the L earphone into the charging case
-
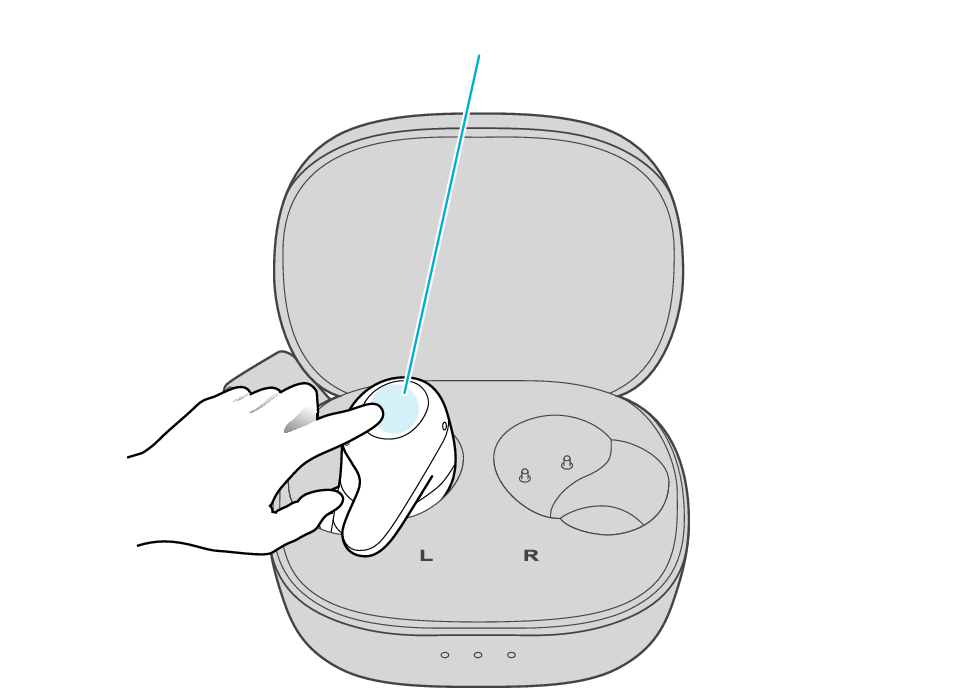
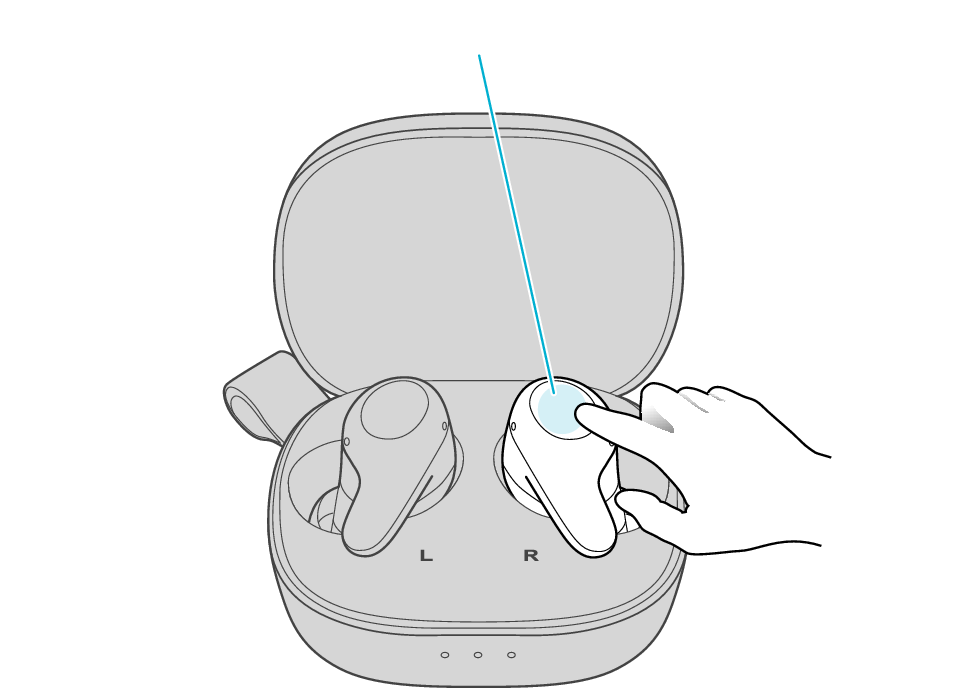
When the indicator on the L earphone is lighting up, touch and hold the touch sensor area on the L earphone for about 10 seconds
-
While flashing, tap the touch sensor area twice quickly to initialize
After a few seconds, the indicator on the L earphone and charging case will light up.
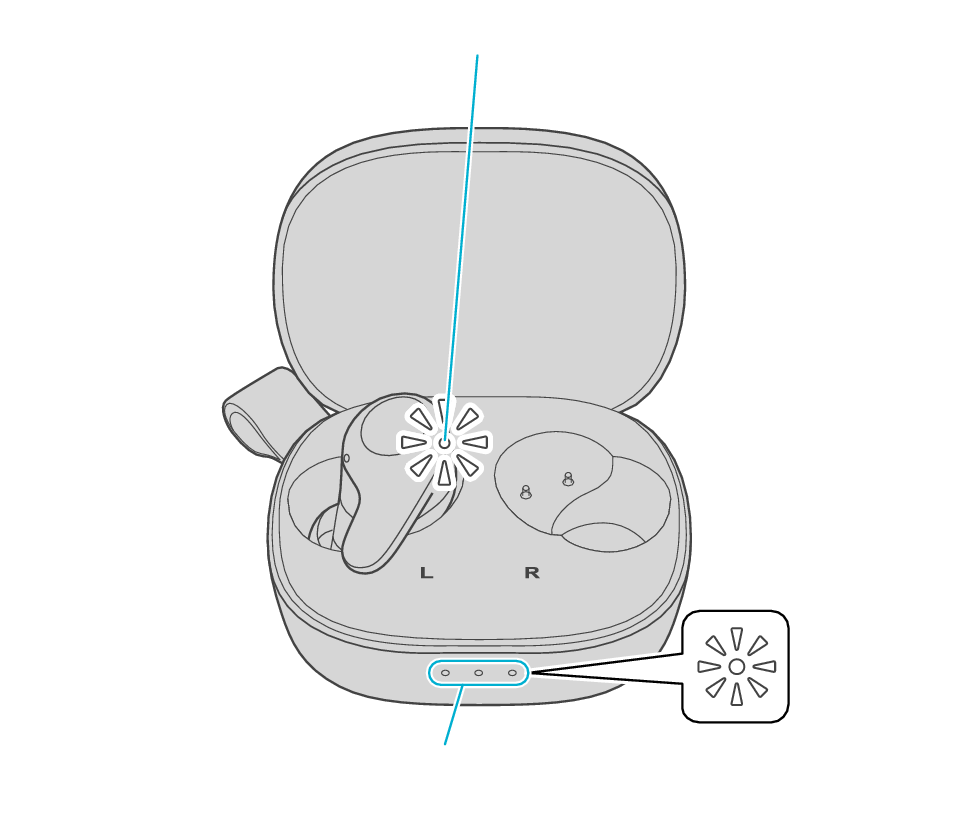
Indicator
Indicators
Click here if the indicators do not light up or start flashing >>
Touch sensor area
Release your finger after the L indicator flashes quickly.
If the indicator does not flash, start over from step 1.
Touch sensor area
The indicator will stop flashing after 5 seconds. Tap it twice quickly while it is still flashing.
After initialization is complete, the L indicator will flash twice slowly.
If initialization is not successful, start over from step 1.
Initialize the R earphone.
-
Insert the R earphone into the charging case
-
When the indicator on the R earphone is lighting up, touch and hold the touch sensor area on the R earphone for about 10 seconds
-
While flashing, tap the touch sensor area twice quickly to initialize
After few seconds, the indicator on the charging case lights up.
Indicator
Indicators
Touch sensor area
Release your finger after the R indicator flashes quickly.
If the indicator does not flash, start over from step 4.
Touch sensor area
The indicator will stop flashing after 5 seconds. Tap it twice quickly while it is still flashing.
After initialization is complete, the R indicator will flash twice slowly.
If initialization is not successful, start over from step 4.
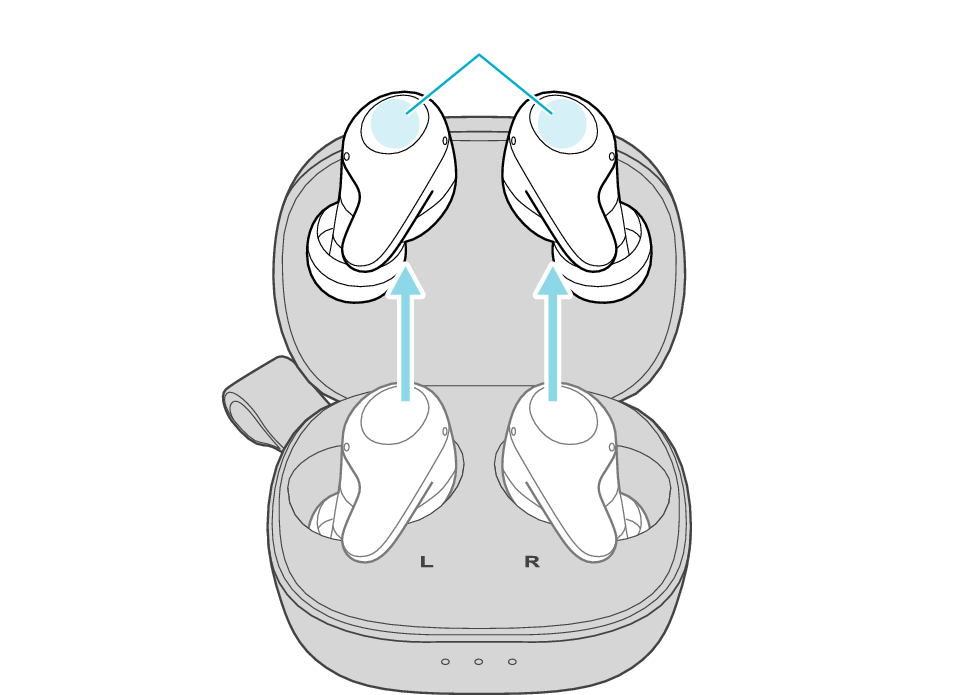
Connect the L earphone with the R earphone.
-
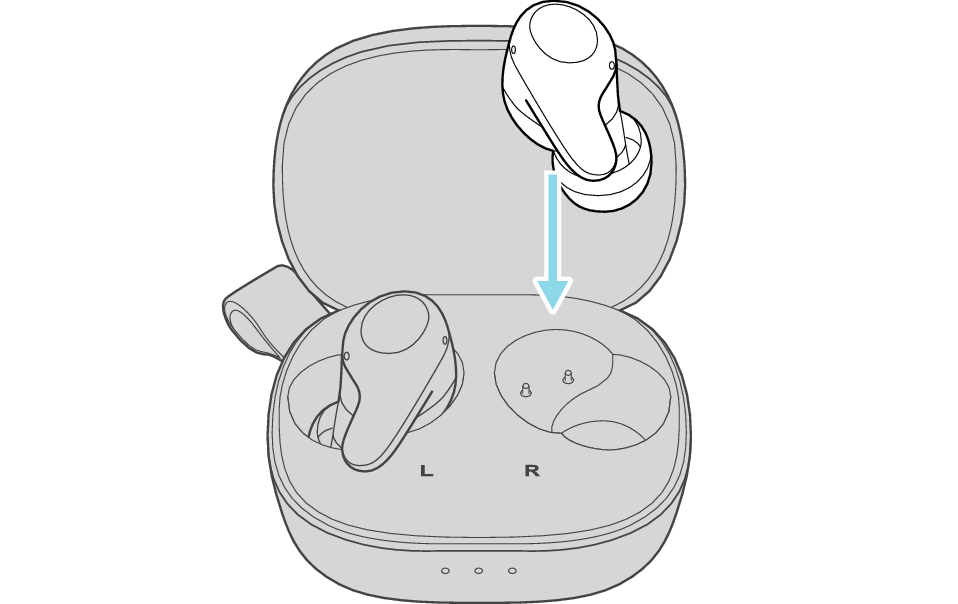
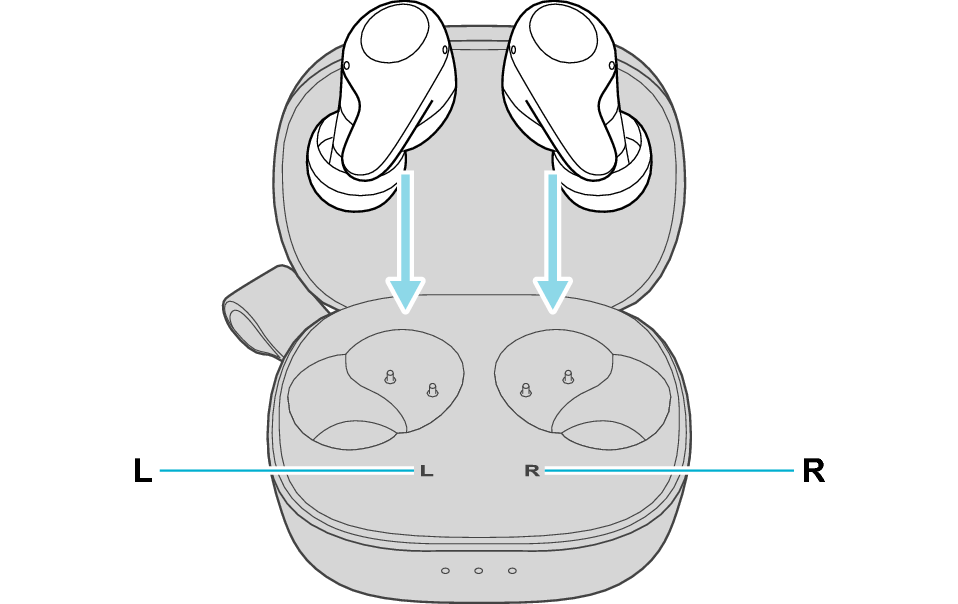
Remove the earphones from the charging case and place them so that the L and R earphones are placed next to each other
Be careful not to touch the touch sensor area when taking them out.
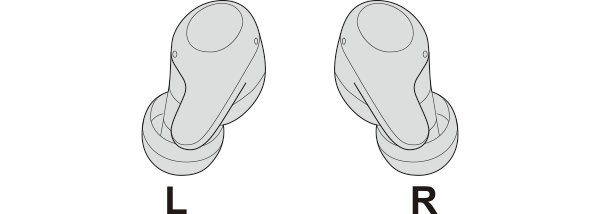
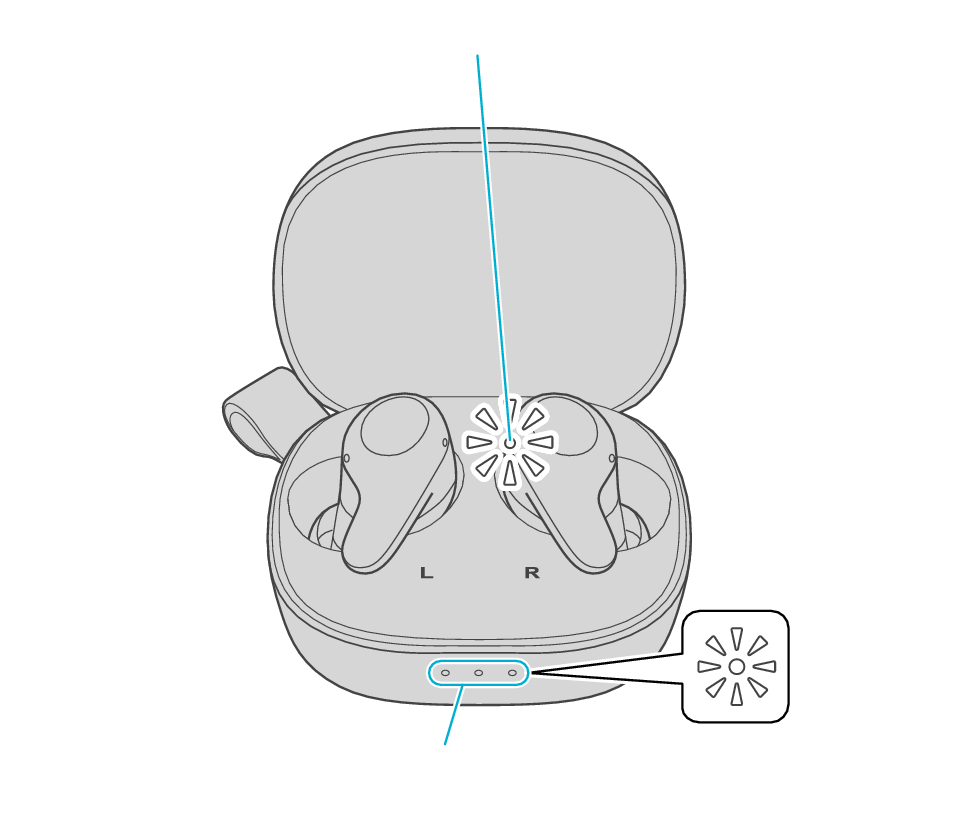
The L and R indicators light up and the power turns on.
Wait for a short while for the indicator on one earphone to flash quickly and the indicator on the other earphone to flash twice in every 5 seconds. The earphones are now ready for device pairing.

After taking out the earphones, move the L and R earphones close to the device to pair with.
Connecting to a Device
Turn on the BLUETOOTH connection setting of the device and select “JVC HA-A23T”

JVC HA-A23T
The earphones are connected to the device if the indicators on both sides of the earphones are flashing every 5 seconds.
Apps and Volume Control on the Connected Device
-
Open an app and play
-
Adjust the volume
Select the state after checking
Thank you for using Troubleshooting Guide.
There seems to be a problem with the product.
If you require more assistance, please contact your local JVC customer support.
The power is off if there is no light on the earphone.
Check whether the power of the earphones can be turned on.
Turn on the power of the earphones
Touch and hold the touch sensor of the earphone that is not lighted up for about 3 seconds.

Touch sensor area
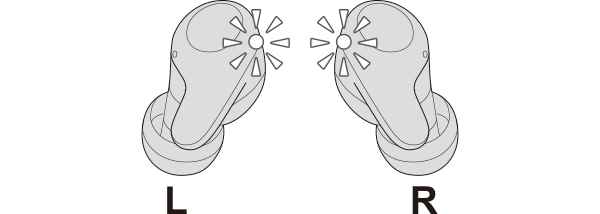
The L side of the earphone is used in the illustration above.
The power of the earphones is on if the indicators on both earphones are flashing.
Select the state after checking
Return to the top of the page and re-select the pattern in which the indicators are flashing.
The charging case and earphones have run out of power.
Charge the earphones followed by reconnecting to check whether sound can be heard properly.
Charge the charging case and earphones
-
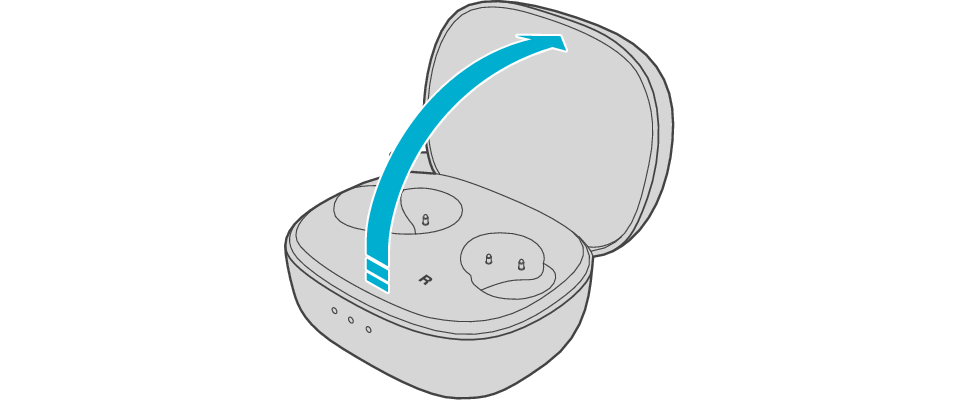
Open the charging case
-
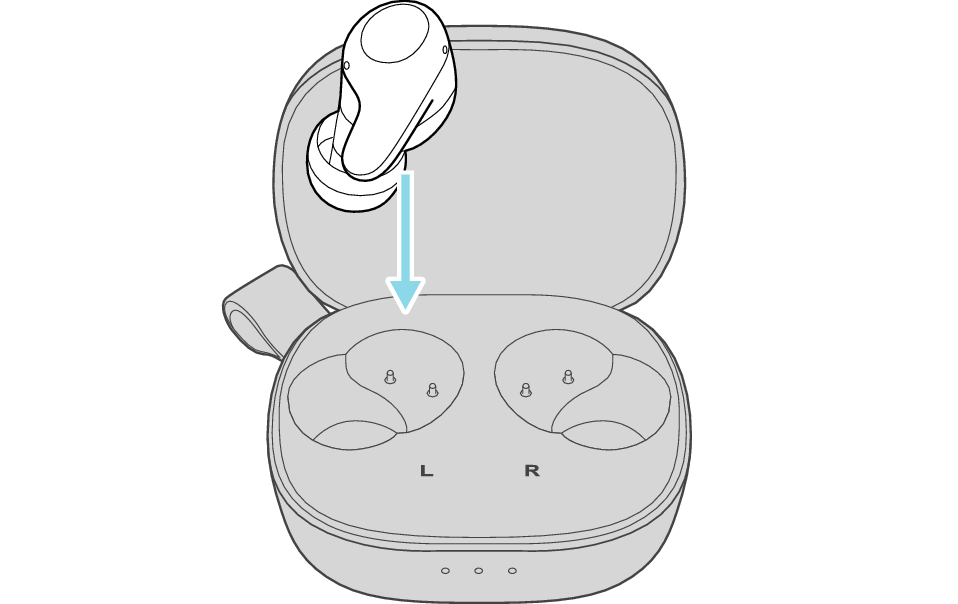
Insert the earphones into the charging case
-
Charge the charging case and earphones
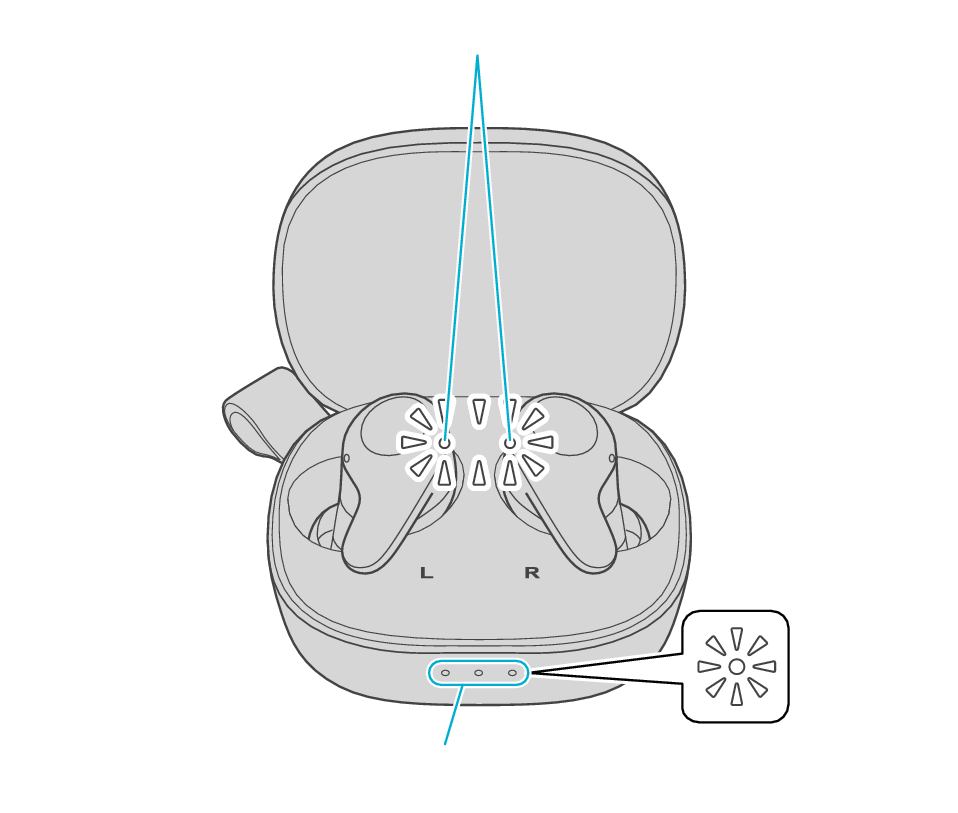
Indicator
Indicators
After the earphones are inserted into the charging case, the power of the earphones will automatically turn off.
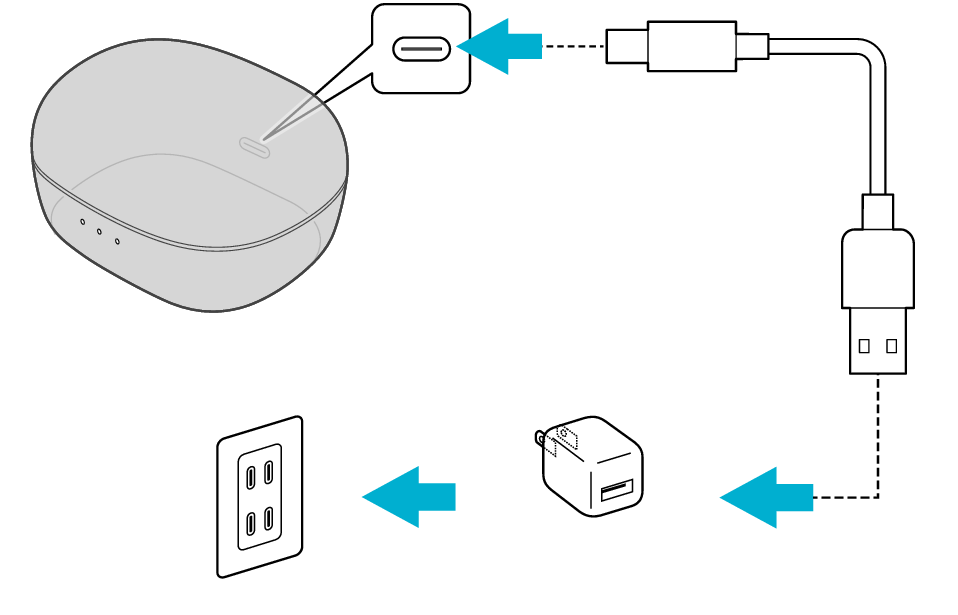
5V TYPE
The indicator on the charging case starts flashing, indicating that charging has started.
During charging of the charging case, the indicator on the case will continue to light up or flash. When charging is complete, the indicator goes out.
The indicators on the earphones light up while charging the earphones. When charging is complete, the indicators go out.
When charging the earphones or charging case that have not been used for a long period of time, it might take some time for the indicators to light up. Wait for the indicators to light up.
Click here if the indicators do not light up or start flashing >>
Connecting to a Device
-
Remove both earphones at the same time
-
Turn on the BLUETOOTH connection setting of the device and select “JVC HA-A23T”
Be careful not to touch the touch sensor area when taking them out.
Touch sensor area
The indicators on both sides of the earphones start flashing and the power turns on.
Wait for a short while. When the indicator on one earphone starts to flash twice every 5 seconds and the indicator on the other earphone starts to flash quickly, the earphones are ready for device pairing.
After taking out the earphones, move the L and R earphones close to the device to pair with.
JVC HA-A23T
The earphones are connected to the device if the indicators on both sides of the earphones are flashing every 5 seconds.
Apps and Volume Control on the Connected Device
-
Open an app and play
-
Adjust the volume
Select the state after checking
Thank you for using Troubleshooting Guide.
If there is no sound although the indicators are flashing, return to the top of the page and re-select the pattern in which the indicators are flashing.
The earphones may not have been properly charged.
Please check the following.
Initializing the earphones and re-establishing the connection may help to solve the problem.
Follow the steps below to check whether there is any abnormality with the sound output.
Initializing
First of all, go to the Bluetooth settings of the device to be connected and delete the information of this unit that is registered on it.
Charge the charging case beforehand.
Remove the earphones once if they are inserted into the charging case.
Follow the steps below to initialize the settings of both L and R earphones.
Initialize the L earphone.
-
Insert the L earphone into the charging case
-
When the indicator on the L earphone is lighting up, touch and hold the touch sensor area on the L earphone for about 10 seconds
-
While flashing, tap the touch sensor area twice quickly to initialize
After a few seconds, the indicator on the L earphone and charging case will light up.
Indicator
Indicators
Click here if the indicators do not light up or start flashing >>
Touch sensor area
Release your finger after the L indicator flashes quickly.
If the indicator does not flash, start over from step 1.
Touch sensor area
The indicator will stop flashing after 5 seconds. Tap it twice quickly while it is still flashing.
After initialization is complete, the L indicator will flash twice slowly.
If initialization is not successful, start over from step 1.
Initialize the R earphone.
-
Insert the R earphone into the charging case
-
When the indicator on the R earphone is lighting up, touch and hold the touch sensor area on the R earphone for about 10 seconds
-
While flashing, tap the touch sensor area twice quickly to initialize
After few seconds, the indicator on the charging case lights up.
Indicator
Indicators
Touch sensor area
Release your finger after the R indicator flashes quickly.
If the indicator does not flash, start over from step 4.
Touch sensor area
The indicator will stop flashing after 5 seconds. Tap it twice quickly while it is still flashing.
After initialization is complete, the R indicator will flash twice slowly.
If initialization is not successful, start over from step 4.
Connect the L earphone with the R earphone.
-
Remove the earphones from the charging case and place them so that the L and R earphones are placed next to each other
Be careful not to touch the touch sensor area when taking them out.
The L and R indicators light up and the power turns on.
Wait for a short while for the indicator on one earphone to flash quickly and the indicator on the other earphone to flash twice in every 5 seconds. The earphones are now ready for device pairing.
After taking out the earphones, move the L and R earphones close to the device to pair with.
Connecting to a Device
Turn on the BLUETOOTH connection setting of the device and select “JVC HA-A23T”
JVC HA-A23T
The earphones are connected to the device if the indicators on both sides of the earphones are flashing every 5 seconds.
Apps and Volume Control on the Connected Device
-
Open an app and play
-
Adjust the volume