Unable to turn on the power

The following describes possible solutions when the earphones do not power on.
Follow the steps below to check whether the problem can be solved.
The earphones may be out of battery.
Charge the earphones followed by checking whether the power can be turned on properly.
Charge the charging case and earphones
-
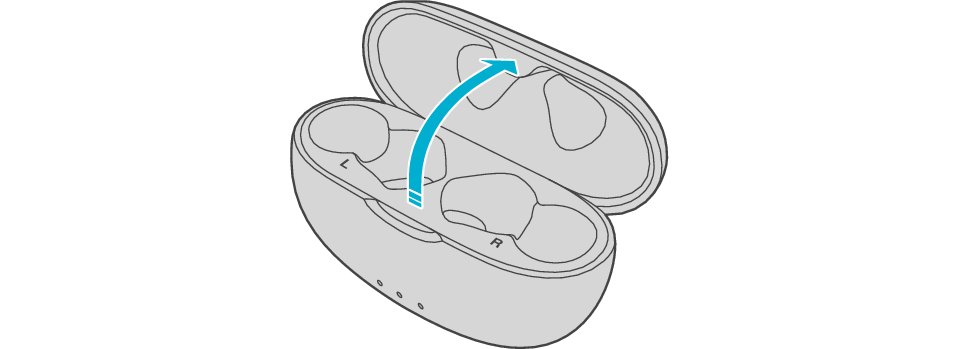
Open the charging case
-
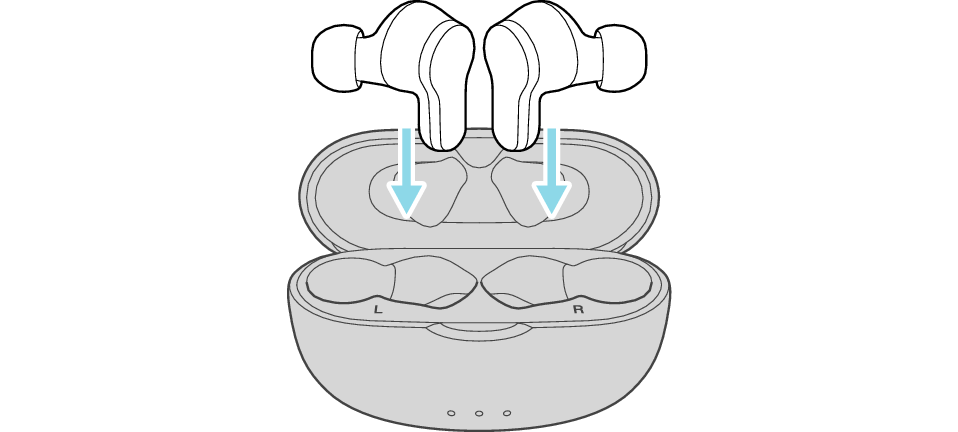
Insert the earphones into the charging case
-
Close the charging case
-
Charge the charging case and earphones

After the earphones are inserted into the charging case, the power of the earphones will automatically turn off.
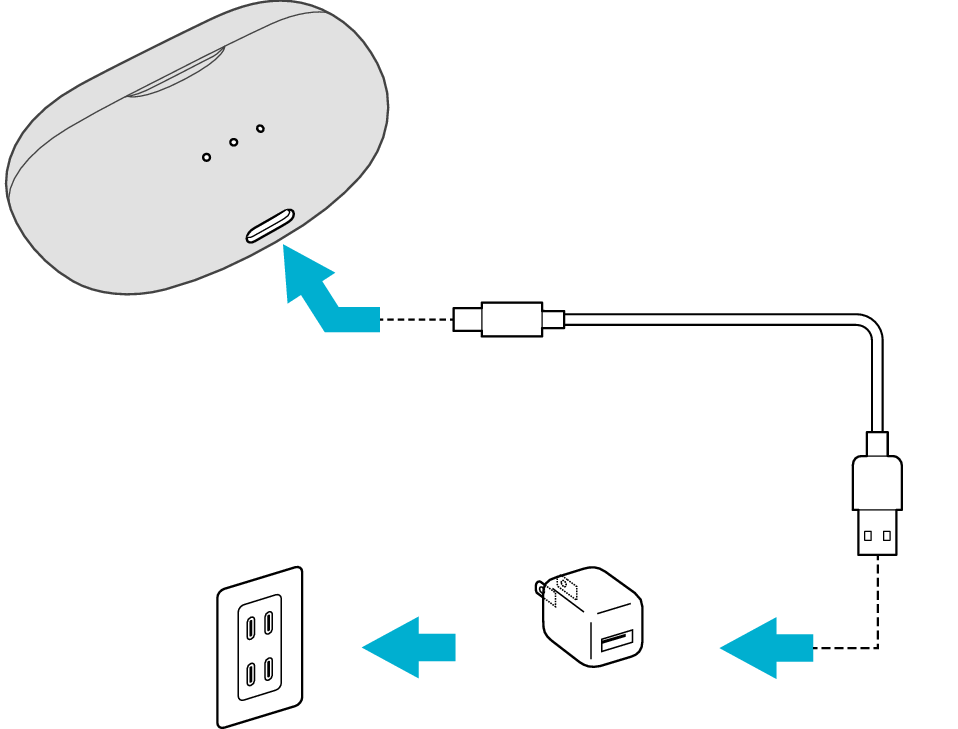
5V TYPE
The indicator on the charging case starts flashing, indicating that charging has started.
During charging of the charging case, the indicator on the case will continue to flash. When charging is complete, all the indicators light up.
The indicators on the earphones will remain lit while charging of the earphones is in progress. When charging is complete, the light of indicators goes out. The indicator on the charging case will light up for 3 seconds.
When charging the earphones or charging case that have not been used for a long period of time, it might take some time for the indicators to light up. Wait for the indicators to light up.
Click here if the indicators do not light up or start flashing >>
When charging is complete, the indicators on the earphones will turn off.
Checking whether power can be turned on
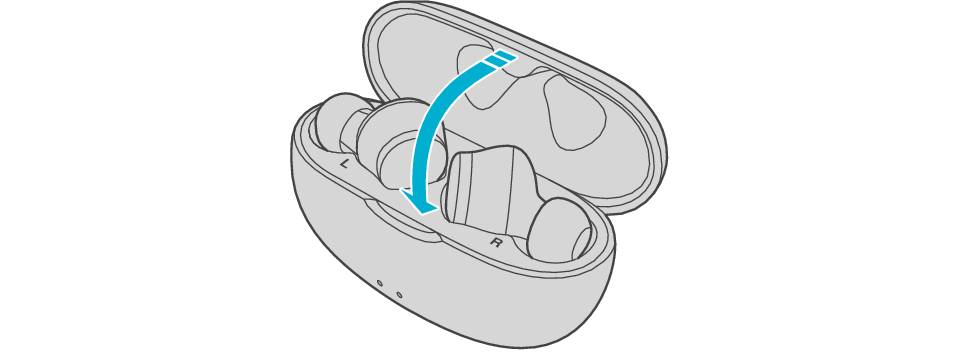
Remove both earphones at the same time.
Be careful not to touch the touch sensor area when taking them out.
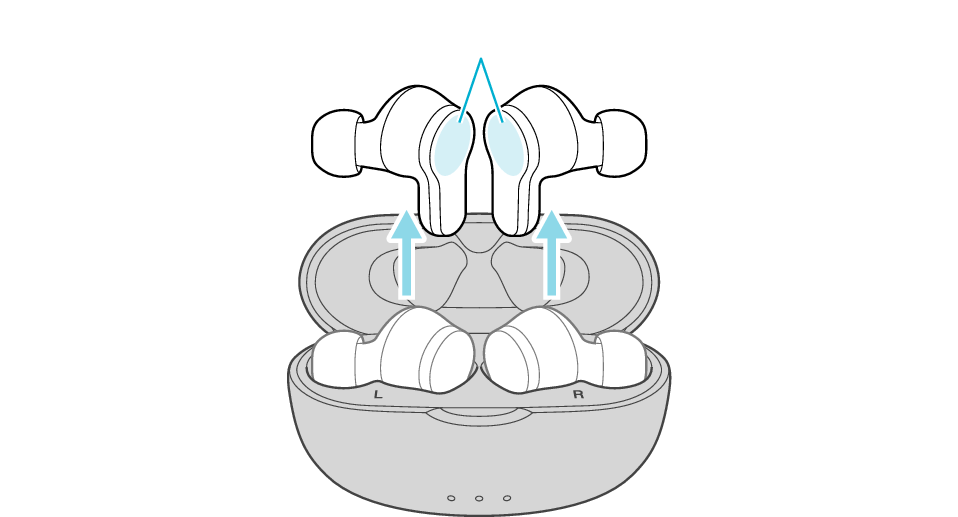
Touch sensor area
The power turns on, and the indicators on both sides of the earphones start flashing.
Select a relevant earphone indicator state.
Thank you for using Troubleshooting Guide.
The earphones may not have been properly charged due to poor contact.
Clean the contacts and check whether the earphones can be properly charged.
Cleaning the contacts
Use a cotton swab to remove any dirt from the contacts of the earphones and charging case
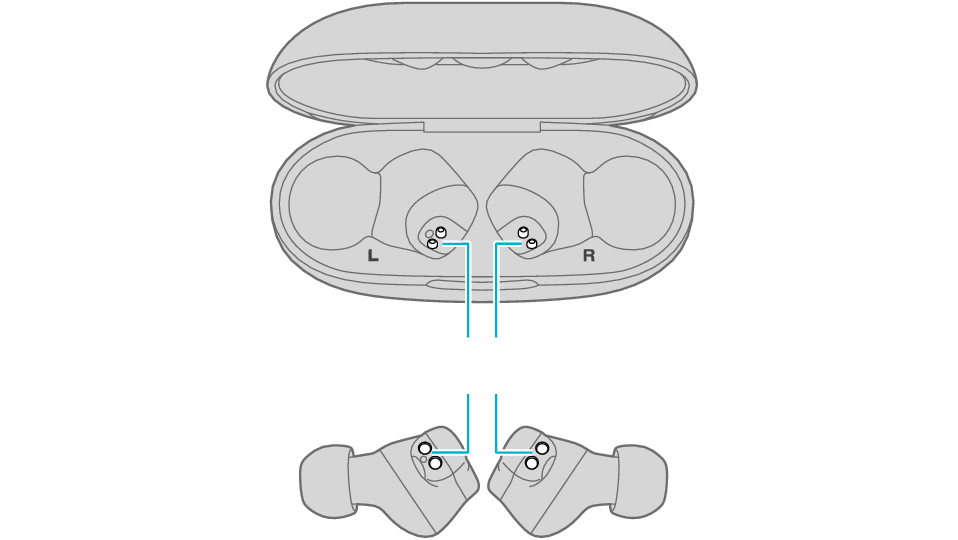
Charging terminals
Dirt or dust attached to the contacts may result in poor contact and prevent charging from being performed properly.