Unable to charge

The following describes possible solutions when the earphones cannot be charged.
Follow the steps below to check whether the problem can be solved.
Select a relevant symptom
The earphones may not have been properly charged due to poor contact.
Check the state of the charging terminal followed by checking whether charging can be properly performed.
Checking the state of the charging terminal
-
Check whether there is dust or dirt on the charging terminal
-
Insert the USB cable and make sure that it is plugged in all the way
Dust or dirt on the charging terminal may result in poor contact. Conduct checks on a periodic basis.
The indicator on the charging case lights up or flashes when charging starts.
Select a relevant charging case indicator state
Thank you for using Troubleshooting Guide.
Charging cannot be properly performed for some reason.
Check whether the charging can be properly performed by following the conditions indicated below.
Check the adapter, cable and charging temperature range
Check to make sure that the following conditions are met before charging.
Is the adapter in use a DC 5 V adapter?
Is the current of the adapter in use 1 A or higher?
Is the USB cable that comes supplied with the earphones being used?
Is the ambient temperature during charging between 5 °C and 35 °C ?
Select a relevant charging case indicator state
Thank you for using Troubleshooting Guide.
There seems to be a problem with the product.
If you require more assistance, please contact your local JVC customer support.
The charging case may have run out of power.
Charge the charging case and check whether the earphones can be properly charged.
Charge the charging case
Connect the charging cable provided to start charging.
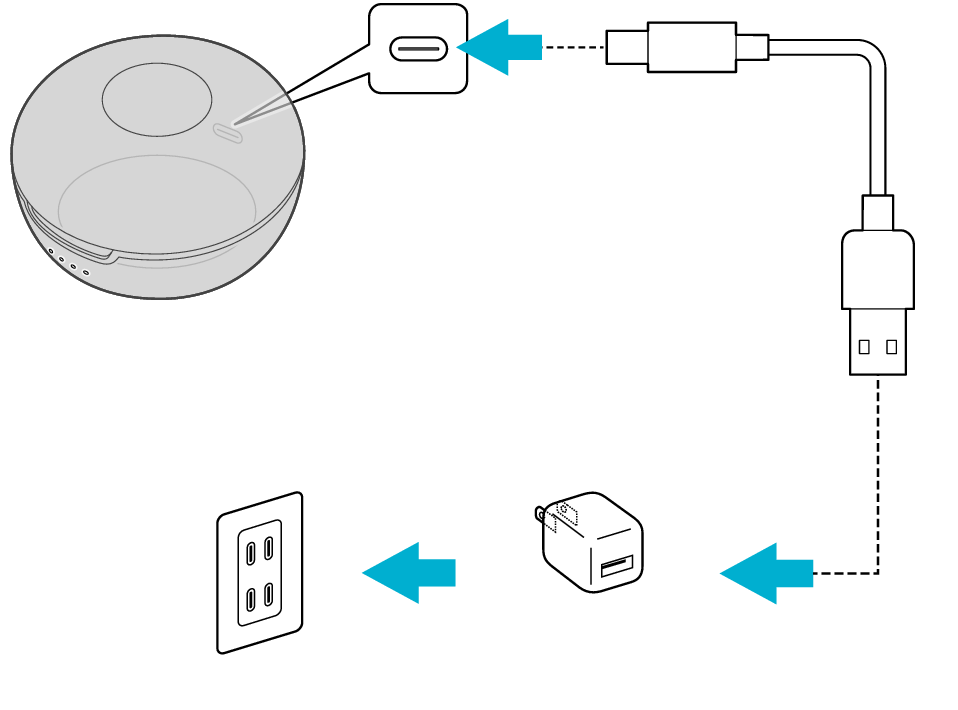
5V TYPE
During charging of the charging case, the indicators for the charging case will remain lit or flashing. When charging is complete, all indicators go out.
When charging the charging case that has not been used for a long period of time, it might take some time for the indicators to light up or flash. Wait for the indicators to light up or flash.
Insert the earphones into the charging case
Insert the earphones securely into the charging case

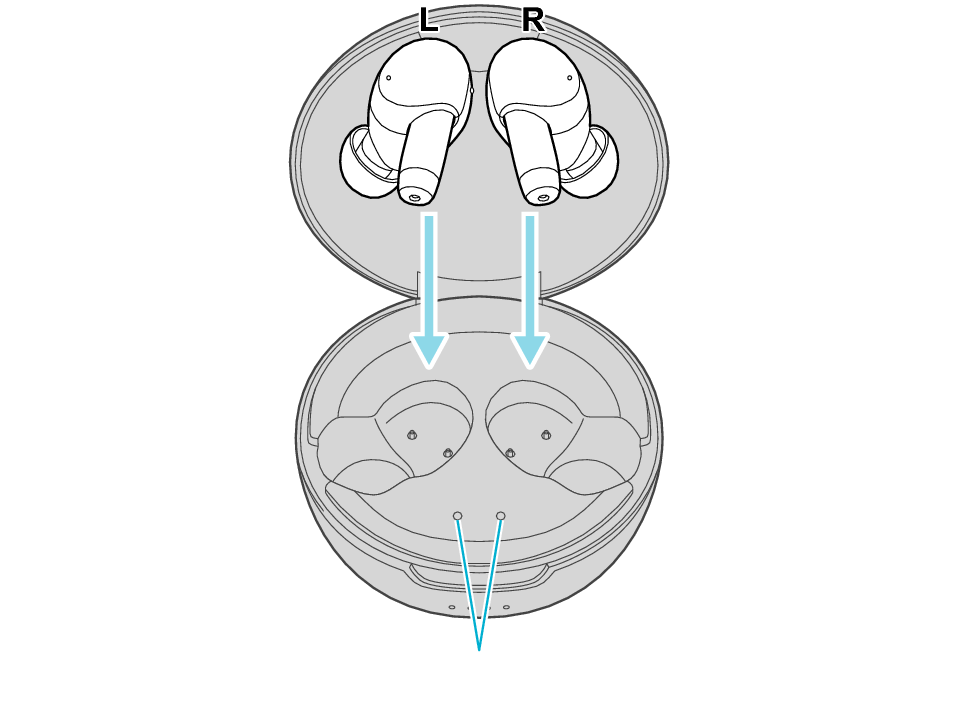
Indicators for the earphones
Make sure to close the lid of the charging case.
The indicators for the earphones will remain lit while charging of the earphones is in progress. When charging is complete, the light of indicators goes out.
When charging the earphones that have not been used for a long period of time, it might take some time for the indicators to light up. Wait for the indicators to light up.
Select the state after checking
Thank you for using Troubleshooting Guide.
The earphones may not have been properly charged due to poor contact.
Clean the contacts and check whether the earphones can be properly charged.
Cleaning the contacts
-
Use a cotton swab to remove any dirt from the contacts of the earphones and charging case
-
Insert the earphones securely into the charging case
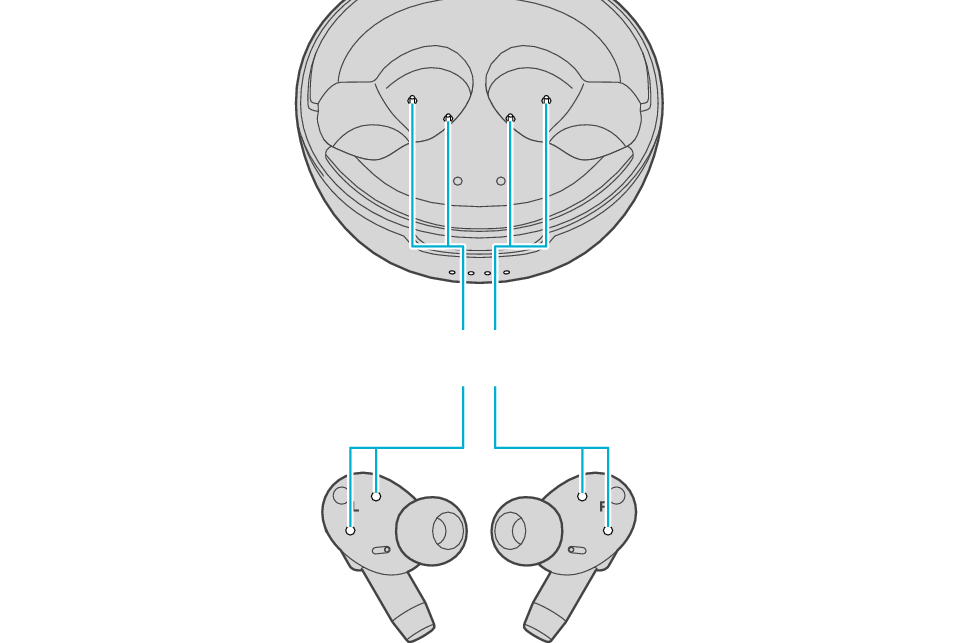
Charging terminals
Dirt or dust attached to the contacts may result in poor contact and prevent charging from being performed properly.
Indicators for the earphones
Make sure to close the lid of the charging case.
The indicators for the earphones will remain lit while charging of the earphones is in progress. When charging is complete, the light of indicators goes out.
When charging the earphones that have not been used for a long period of time, it might take some time for the indicators to light up. Wait for the indicators to light up.