When the power is first turned on, the Initial Setting screen for performing the initial settings in the camera recorder appears.
Set the date/time of the built-in clock in the [Date/Time] screen.
All operations are disabled until initial settings are complete.
Initial Settings
Memo
It is recommended to use the AC adapter as the power supply.
Attach the lens cap.
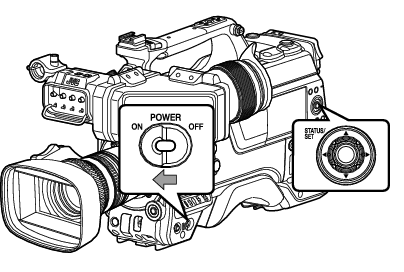
Set the [POWER ON/OFF] switch to “ON”.
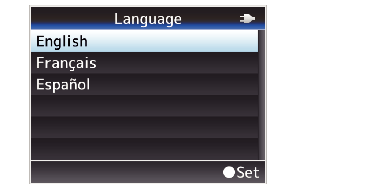
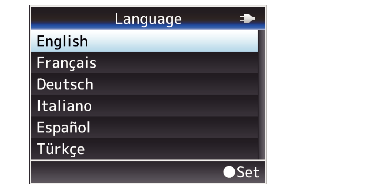
A language selection screen appears.
For U models
For E models
Memo
The menus and messages on the screen of the LCD monitor or viewfinder are displayed in the selected language.
Select a language using the cross-shaped button ( 
 ), and press the [STATUS/SET] button (
  ).
).
), and press the [STATUS/SET] button ( ).A self-diagnosis screen appears.
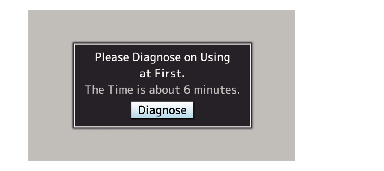
Ensure the lens cap is attached, and press the [STATUS/SET] button ( ).
).Self-diagnosis starts.
A progress bar appears, and “Complete Diagnosis” appears when the diagnosis is complete.
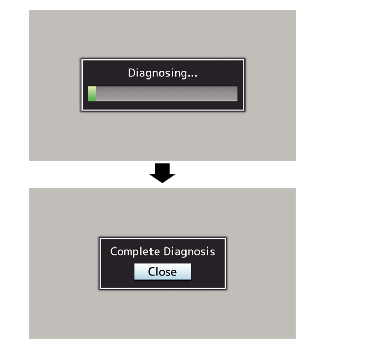
Memo
It takes about 6 minutes to complete the diagnosis. During the diagnosis, do not operate or turn off the camera recorder.
Press the [STATUS/SET] button ( ) after confirming the exit screen.
) after confirming the exit screen.The [Date/Time] screen appears.
For U models
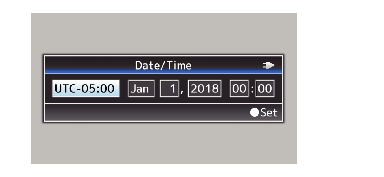
For E models
Set the time zone and date/time.
Move the cursor with the cross-shaped button ( 
 ) and select the setting item.
) and select the setting item.Change the values with the cross-shaped button ( ).
).Press the [STATUS/SET] button ( ) after setting is complete.
) after setting is complete.The clock is set to 0 seconds of the input date/time.
Memo
The configured date/time data can be displayed on the LCD monitor and viewfinder screen and be recorded to a recording media.
The value of the year can be set in the range of “2000” to “2099”.
The configured date/time data is saved in the built-in battery even if the power is turned off.
If the date/time data is no longer retained, the built-in battery is dead. For replacement of the built-in battery, please contact the local dealers in your area.
Changing the Time after Initial Setting
Setting the Date/Time
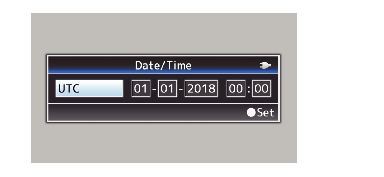
Select [System]  [Date/Time].
[Date/Time].The [Date/Time] screen appears.
Set the date and time.
Move the cursor with the cross-shaped button ( ) and select the setting item.
) and select the setting item.Change the values with the cross-shaped button ( ).
).Press the Set button ( ) after setting is complete.
) after setting is complete.The clock is set to 0 seconds of the input date/time.
Changing the Display Style
You can change the display style of the date/time on the menu.
Setting the Date Display (Date Style)
The date display can be changed in [System] [Date Style].
Setting the Time Display (Time Style)
The time display can be changed in [System] [Time Style].
Date/Time Display in Each Operation Mode
During Camera mode:
Time of the built-in clock is displayed.
During Media mode:
Shooting date/time of the clip being played back is displayed.
![]()