Copy the files to a Mac computer using the following method.
-

- Copying
-
Copying to Mac Computer
Copying to Mac Computer
Remove the AC adapter and battery pack from this unit.
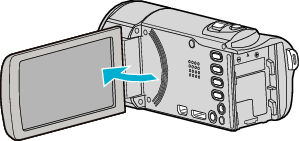
Open the LCD monitor.
Connect the USB cable and the AC adapter.
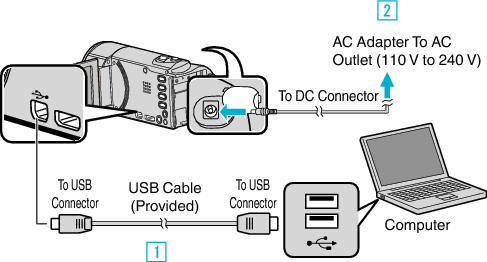
Connect using the provided USB cable.
Connect the AC adapter to this unit.
This unit powers on automatically when the AC adapter is connected.
Be sure to use the supplied AC adapter.
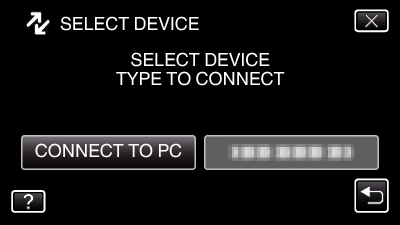
The “SELECT DEVICE” menu appears.
Tap “CONNECT TO PC”.
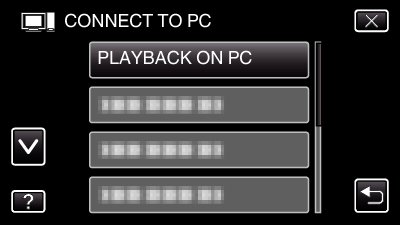
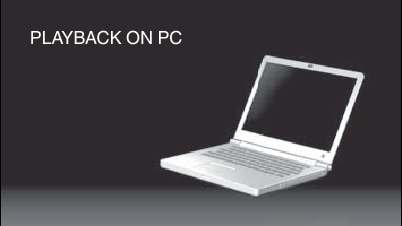
Tap “PLAYBACK ON PC”.
Tap ![]() to exit the menu.
to exit the menu.
Tap ![]() to return to the previous screen.
to return to the previous screen.
The following screen is displayed after the camera operation is completed.
The “JVCCAM_MEM” or “JVCCAM_SD” icon appears on the desktop.
Start iMovie.
The subsequent operations are to be performed on the Mac computer.
Caution
When the camera and PC are connected by an USB cable, recorded media are read-only.
MTS files that are copied to a Mac computer cannot be imported to iMovie.
To use MTS files with iMovie, import the files using iMovie.
Memo
To edit/view the files, use a software that supports iFrame (video)/ AVCHD (video)/JPEG (still image) files.
When removing this unit from the computer, drag and drop the “JVCCAM_MEM” or “JVCCAM_SD” icon on the desktop to the trash bin.
iMovie and iPhoto
You can import files from this unit to a computer using Apple’s iMovie’08, ’09, ’11 (video) or iPhoto (still image).
To verify the system requirements, select “About This Mac” from the Apple menu. You can determine the operating system version, processor and amount of memory.
For the latest information on iMovie or iPhoto, refer to the Apple website.
For details on how to use iMovie or iPhoto, refer to the help file of the respective softwares.
There is no guarantee that the operations will work with all computer environments.