Set the clock with “CLOCK ADJUST” from the menu.
-

- Getting Started
- Clock Setting
-
Resetting the Clock
- Attaching the Accessories
- Charging the Battery Pack
- Grip Adjustment
- Inserting an SD Card
- Using the Touch Screen
- Clock Setting
- Changing the Display Language
- Holding this Unit
- Tripod Mounting
- Adjusting the Angle of the LCD Monitor
- Attaching the External Microphone
- Using this Unit Overseas
- Optional Accessories
Resetting the Clock
Tap “MENU”.
_IZYUILvdsdgwox.png)
Tap “SETUP”.
_UJDCILkrscevgk.png)
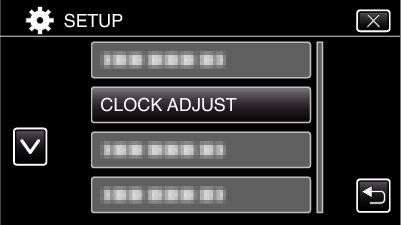
Tap “CLOCK ADJUST”.

Tap  or
or  to scroll the screen.
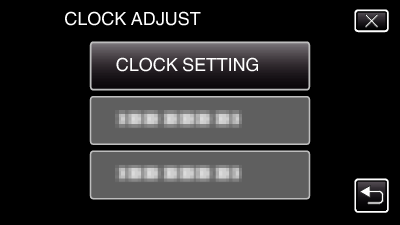
Tap “CLOCK SETTING”.

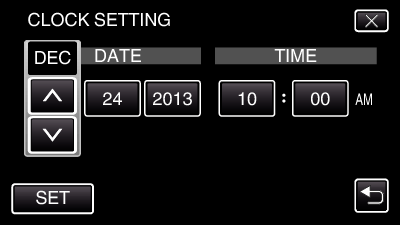
Set the date and time.

“  ” and “
  ” are displayed when items in “DATE” and “TIME” are tapped.
Set “DATE” and “TIME” by tapping  or
or  .
.
Repeat this step to enter “DATE” and “TIME”.
After setting the date and time, tap “SET”.

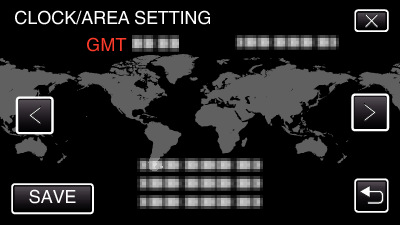
Select the region where you live and tap “SAVE”.

Time difference between the selected city and the GMT (Greenwich Mean Time) is displayed.
Tap  or
or  to select the city name.
