You can record without worrying about the setting details by using the Intelligent Auto mode. Settings such as exposure and focus will be adjusted automatically to suit the shooting conditions.
- In case of specific shooting scenes such as person etc., its icon is displayed on the screen.
- Before recording an important scene, it is recommended to conduct a trial recording.
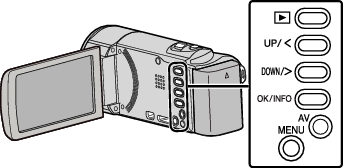
To select/move cursor towards up/left or down/right, press the button UP/< or DOWN/>.

Open the lens cover.


Open the LCD monitor.
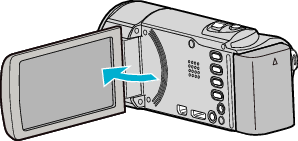
- The unit turns on and the video mode icon appears.

Check if the recording mode is Intelligent Auto.
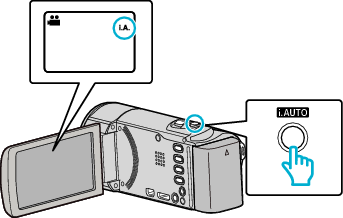
- If the mode is
 Manual, press the i.AUTO button to switch.
The mode changes between Intelligent Auto and Manual with every press.

Start recording.
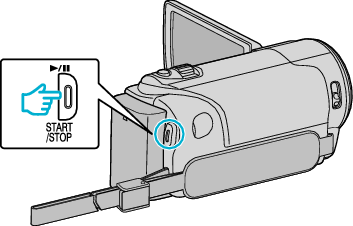
- Press again to stop.
- Depending on the subject and shooting conditions, recording may not be performed properly even in the Intelligent Auto mode.
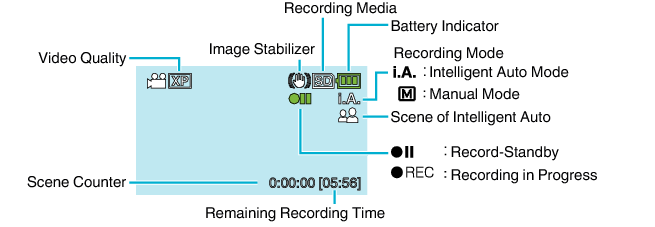
Indications During Video Recording
| Display Icon | Description |
|---|---|
| Recording Mode |
Press the i.AUTO button to switch the recording mode between |
| Video Quality |
Displays the icon of the “VIDEO QUALITY” setting selected in the recording menu. |
| Remaining Recording Time |
Displays the remaining time for video recording. |
| Recording in Progress |
Appears when video recording is in progress. |
| Record-Standby |
Appears when video recording is paused. |
| Scene Counter (Recorded Time) |
Displays the elapsed time of the video that is currently being recorded. |
| Recording Media |
Displays the icon of the recording media. |
| Battery Indicator |
Displays the approximate remaining battery power. |
| Image Stabilizer |
Displays the image stabilizer setting. |
| Display Icon | Description |
|---|---|
| |
Captures one’s skin beautifully. |
| |
Allows people to be captured naturally. |
| |
Focuses at a far distance and captures a sharp image with vivid colors. |
| |
Records with minimal noise in the overall image. |
| |
Allows night scenes to be captured accurately with minimal noise in the overall image. |
| |
Prevents colors from fading even when recording in a bright environment. |
| |
Records while focusing on a near object. |
| |
Reproduces the green color of trees vividly. |
| |
Reproduces the colors of sunset naturally. |
| |
Adjusts settings so that the subject does not appear too dark due to backlight. |
| |
Allows people to be captured naturally with minimal noise in the overall image. |
| |
Records while focusing on a near object even in a dark environment. |
- Scenes can be detected according to the shooting conditions and automatically adjusted in Intelligent Auto mode.
- Some functions may not work properly depending on the shooting conditions.
Useful Settings for Recording
- When “QUICK RESTART” is set to “ON”, this unit turns on immediately if you open the LCD monitor within 5 minutes after the power is turned off by closing the monitor.
- When “AUTO POWER OFF” is set to “ON”, this unit turns itself off automatically to conserve power when it is not operated for 5 minutes. (only when using the battery pack)
- When “FACE PRIORITY AE/AF” is set to “ON” (default setting), this unit detects faces and automatically adjusts its brightness and focus to record the faces more clearly.
- Do not expose the lens to direct sunlight.
- Do not use this unit in the rain, snow, or places with high humidity like the bathroom.
- Do not use this unit in places subject to excessive humidity or dust, as well as places exposed to steam or smoke directly.
- Do not remove the battery pack, AC adapter, or SD card when the access lamp is lighted. The recorded data may become unreadable.
- This unit is a microcomputer-controlled device. Electrostatic discharge, external noise and interference (from a TV, a radio, etc.) might prevent it from functioning properly. In such a case, turn off the power, then remove the AC adapter and battery pack. This unit will be reset.
- Make a backup of important recorded data.
It is recommended to copy your important recorded data to a DVD or other recording media for storage.
JVC will not be responsible for any lost data.
- Check the remaining recording time in the media before you start shooting. If there is not enough space, move (copy) the data to a computer or disc.
- Do not forget to make copies after recording!
- Recording stops automatically as it cannot be performed for 12 or more consecutive hours according to specifications.
(It may take some time to resume recording.)
- For long recordings, the file is split into two or more files if the size exceeds 4 GB.
- You can connect this unit to the AC adapter to record for long hours indoors.
- When there are many files in the media, it may take time for them to be displayed on the playback screen. Wait for a while as the access lamp appears blinking, which indicates normal operation.
- Depending on the shooting conditions, the four corners of the screen may appear dark, but this is not a malfunction. In this case, change the shooting conditions by moving the zoom lever, etc.