Set [System]  [Record Set]
  [Record Format]
  [System] to “HD” or “SD”.
Open the [Network]  [Live Streaming]
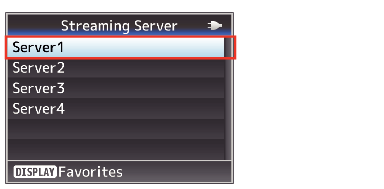
  [Streaming Server] screen.
Select a server using the cross-shaped button ( 
 ), and press the Set button (
  ).
).
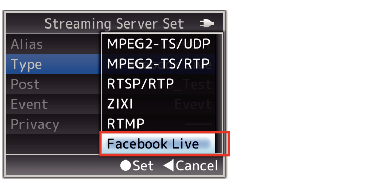
Select “Facebook Live” in [Type].
Complete configuration of the other settings before configuring the “Resolution”, “Frame Rate” and “Bit Rate” settings for live streaming.
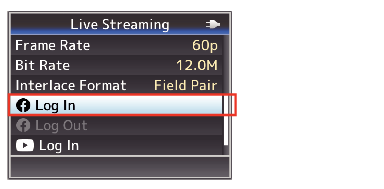
Select [Network]  [Live Streaming]
  [
[ ![]() Log In] to launch the wizard screen.
Log In] to launch the wizard screen.
Enter the URL displayed on the wizard screen into the browser of your device (PC, etc.) or scan the QR code to access the device authentication website.
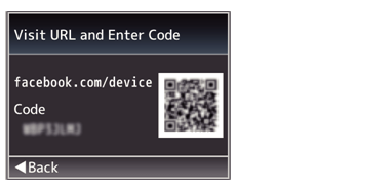
Enter the “Code” displayed on the wizard screen on the device authentication website and press “Next”.
A registration window is displayed. Press [OK] to complete device registration.
Privacy settings (PC/tablet/smartphone operation)
If the privacy settings on the camera are stricter than the Facebook settings during live streaming on a personal timeline, the Facebook settings will override the camera settings.
Example:
Facebook setting = Friends
Camera setting = Public
 Privacy setting = Friends
To assign a higher priority to the privacy settings on the camera, you need to follow the steps below to change the privacy settings on Facebook.
 mark at the top right corner, followed by selecting “Settings and Privacy”
  “Settings”.
The user name and a “login successful” message will appear on the wizard screen. click the Set button (  ) to complete configuration.
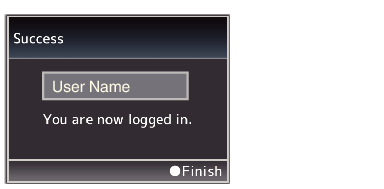
After logging in, you will remained logged in for a period of 60 days.
If you have been logged out of the account after 60 days, perform the steps again from Step 4.
