> When in Trouble > Initializing
Initializing
If no sound is heard from one side of the earphones or the earphones cannot be connected to your BLUETOOTH device, initializing the earphones may solve the problem.
Information of all the paired devices will be deleted (initialized). Perform pairing again from the start.
Start by deleting the registration information of the System from the BLUETOOTH setting on the BLUETOOTH device.
Charge the charging case beforehand.
Remove the earphones once if they are inserted into the charging case.

There are two initialization procedures. Refer to the procedure below.
Check the serial number on the bottom of the charging case and that it is underlined.
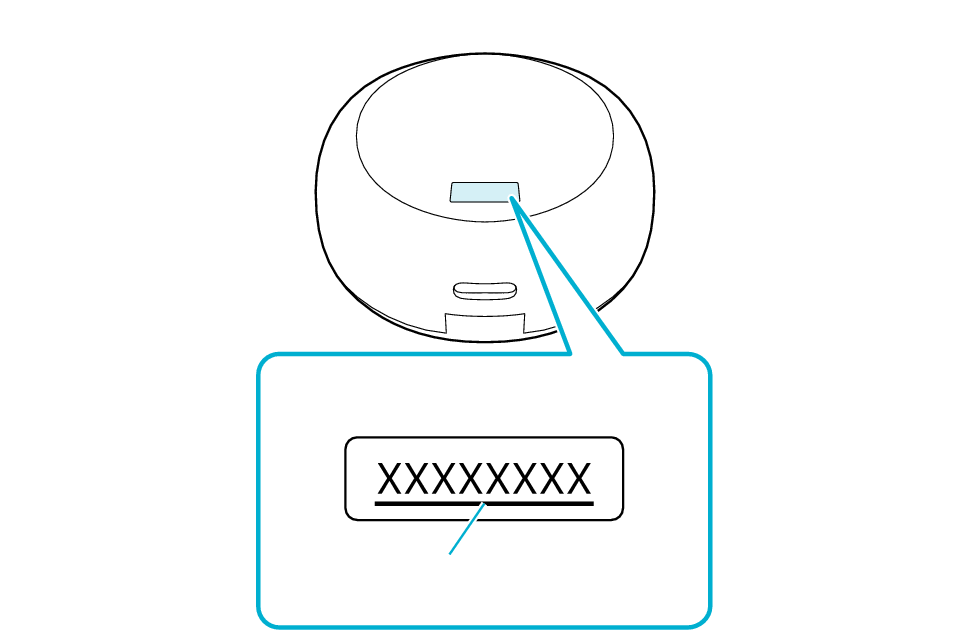
Bottom of the charging case
Serial number
Underline
If the serial number is not underlined, follow the Procedure A (Procedure A) to initialize.
If the serial number is underlined, follow the Procedure B (Procedure B) to initialize.
If you can’t tell if the serial number is underlined or not, initialize by following the Procedure A. Continue with the Procedure B if initialization fails.
Follow the steps below to initialize the settings of both L and R earphones.
-
1Insert the L and R earphones into the charging case.
-

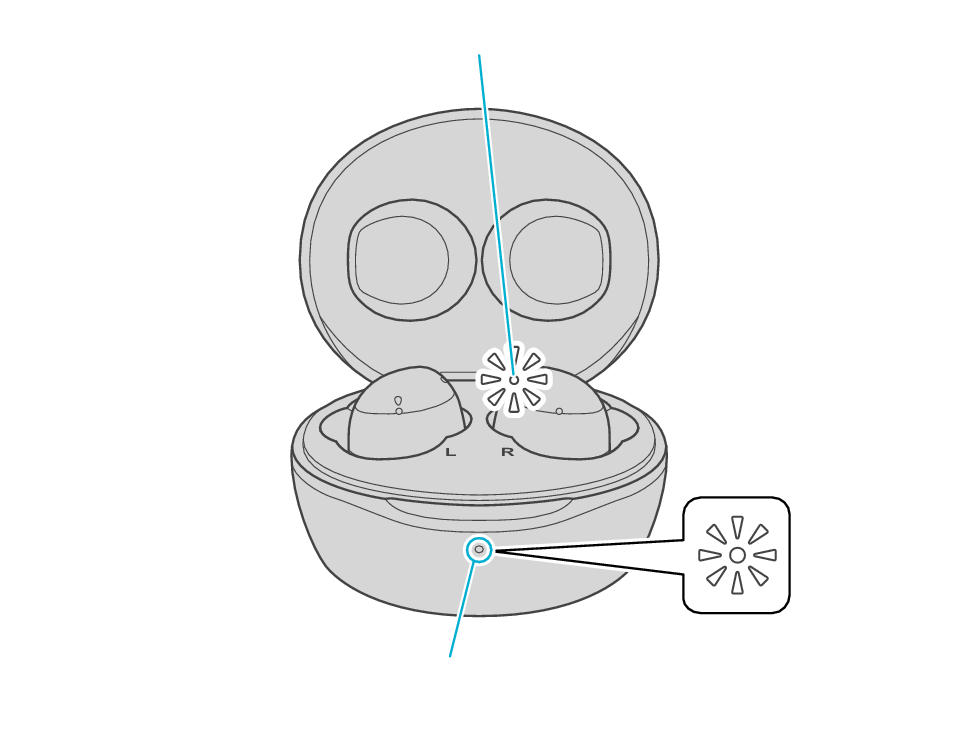
The earphones are charged and the L and R indicators light up.
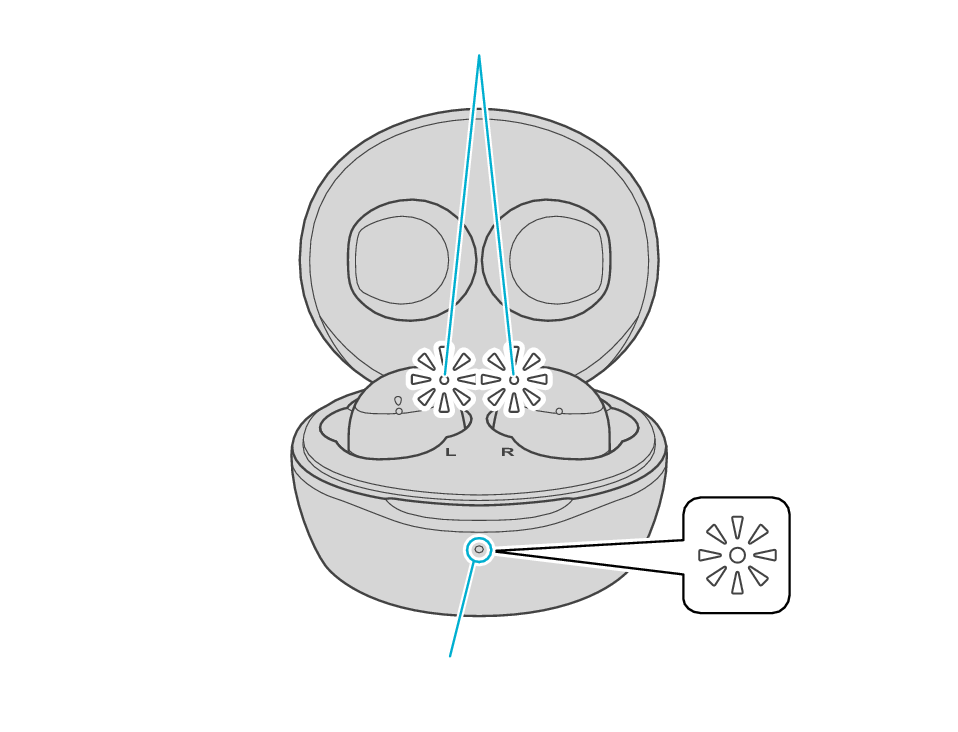
Indicator
Indicator
-
2When the earphone indicator is lighting up, press and hold the L touch sensor area for about 15 seconds until the L indicator flashes twice.
-
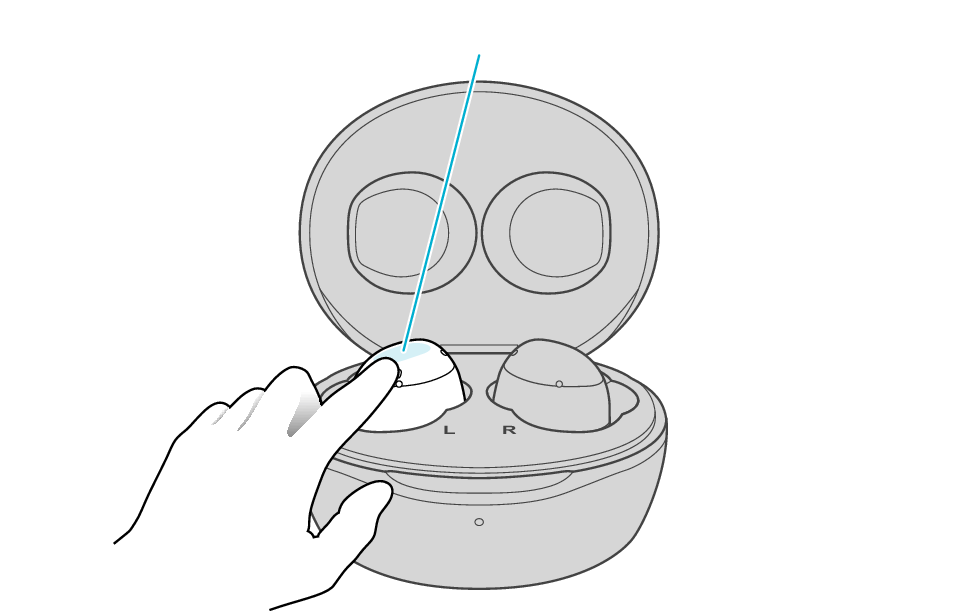
Touch sensor area
If the earphone wobbles and the indicator turns off while touching for 15 seconds, start over from step 1.
After the indicator has flashed, the earphone is charged and the indicator lights up.
If the indicator does not flash, start over from step 1.
-
3When the earphone indicator is lightning up, press and hold the R touch sensor area for about 15 seconds until the R indicator flashes twice.
-
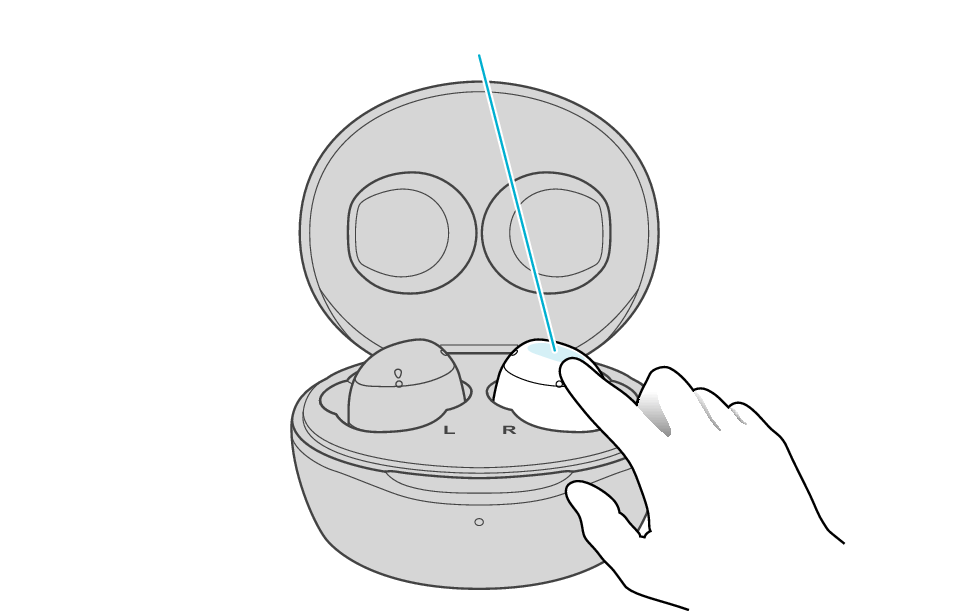
Touch sensor area
If the earphone wobbles and the indicator turns off while touching for 15 seconds, go back to step 1, and start over from step 3.
After the indicator has flashed, the earphone is charged and the indicator lights up.
If the indicator does not flash, go back to step 1, and repeat step 3 from the beginning.
-
4Remove the earphones from the charging case and set the L and R earphones side by side.
-

The L and R indicators light up and the power turns on.
-
5After a short while, the L indicator starts to flash quickly and repeatedly. The R indicator flashes twice every 5 seconds repeatedly.
-

Initialization is now complete.
Information of all paired devices has been deleted. Pair the respective Bluetooth devices (device registration) again. Pairing for the First Time
If initialization fails, the R indicator won't flash twice every 5 seconds. In such case, start the initialization procedure again from the beginning.
When the sound only emits from one side of the earphones even when the earphones are connected to the BLUETOOTH device, touch and hold the touch sensor area on both earphones again to turn off the power and repeat the steps from the beginning.
Follow the steps below to initialize the settings of both L and R earphones.
Initialize the L earphone.
-
1Insert the L earphone into the charging case.
-
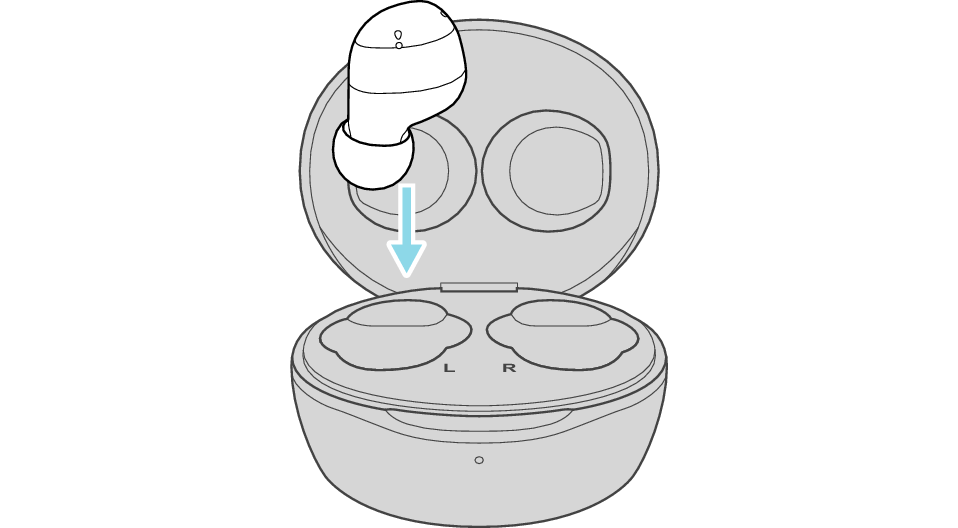
After few seconds, the indicator on the charging case lights up.
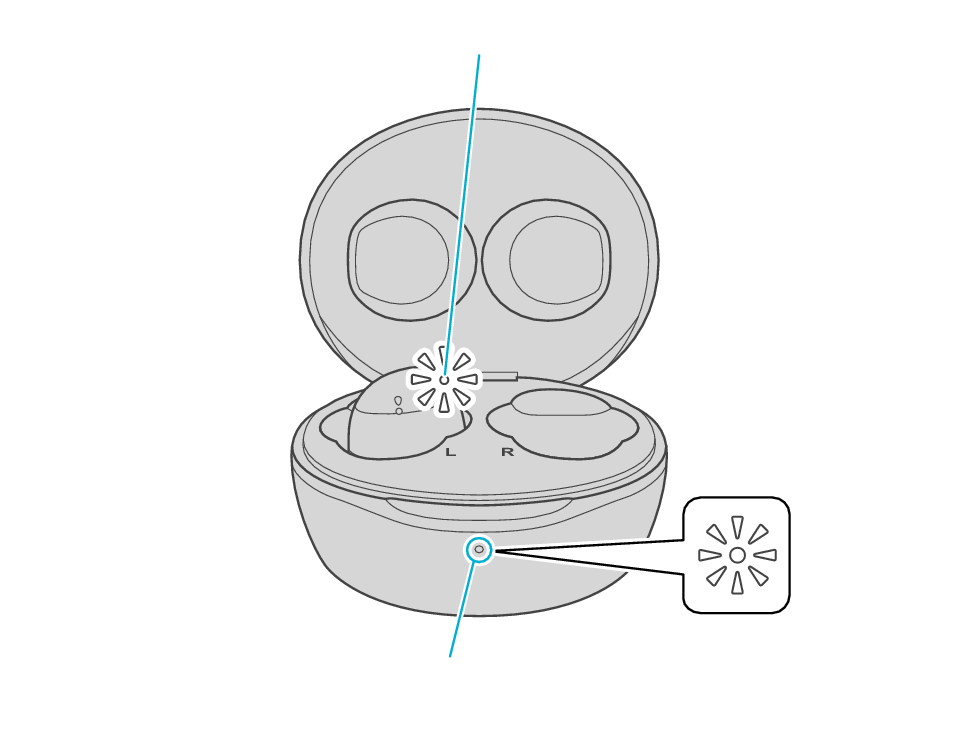
Indicator
Indicator
-
2When the indicator for L earphone is lighting up, press and hold the L touch sensor area for about 10 seconds.
-
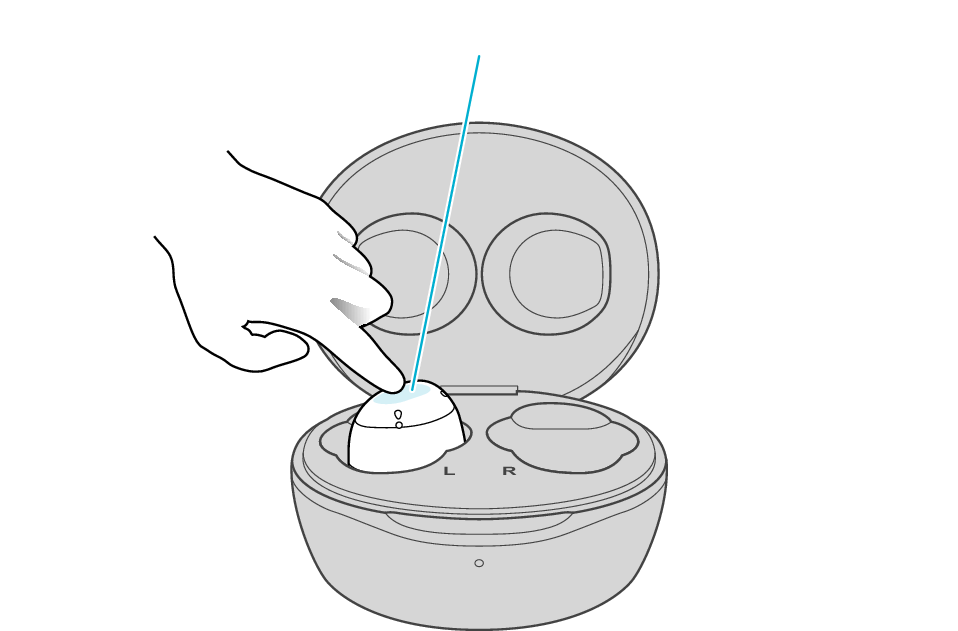
Touch sensor area
If the earphone wobbles and the indicator turns off while touching for 10 seconds, start over from step 1.
Release your finger after the L indicator flashes quickly.
If the indicator does not flash, start over from step 1.
-
3While the indicator is flashing, tapping the touch sensor area twice quickly, initializes the settings.
-
Touch sensor area
The indicator will stop flashing after 5 seconds. Tap it twice quickly while it is still flashing.
After initialization is complete, the L indicator will flash twice slowly.
If initialization is not successful, start over from step 1.
Initialize the R earphone.
-
4Insert the R earphone into the charging case.
-
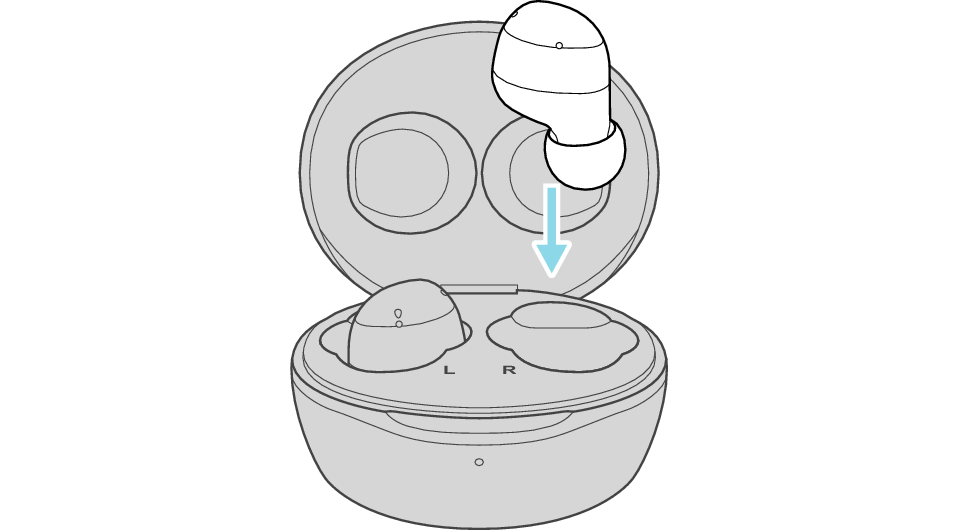
After few seconds, the indicator on the charging case lights up.
Indicator
Indicator
-
5When the indicator for R earphone is lightning up, press and hold the R touch sensor area for about 10 seconds.
-
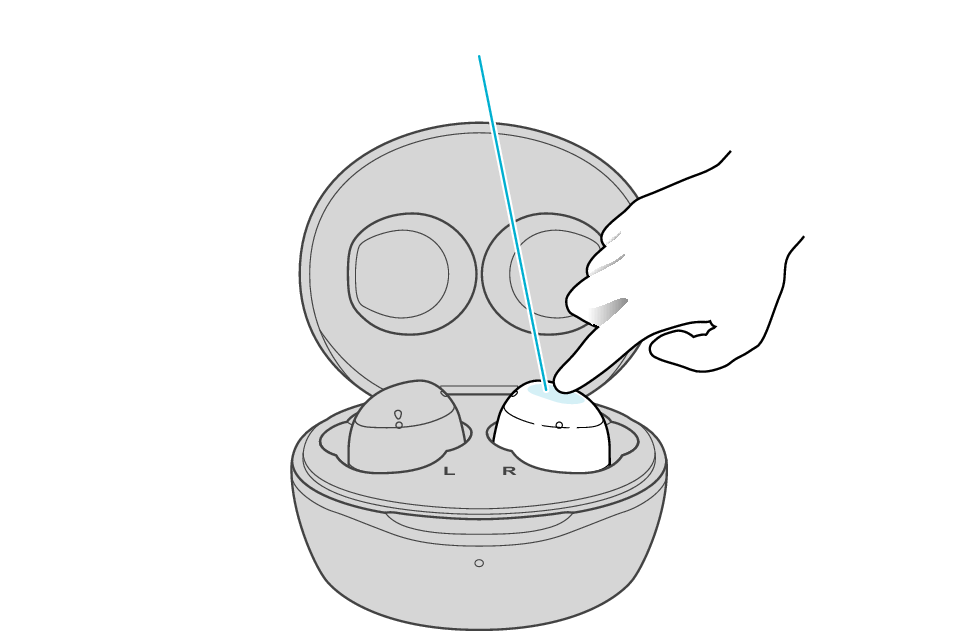
Touch sensor area
If the earphone wobbles and the indicator turns off while touching for 10 seconds, start over from step 4.
Release your finger after the R indicator flashes quickly.
If the indicator does not flash, start over from step 4.
-
6While the indicator is flashing, tapping the touch sensor area twice quickly, initializes the settings.
-
Touch sensor area
The indicator will stop flashing after 5 seconds. Tap it twice quickly while it is still flashing.
After initialization is complete, the R indicator will flash twice slowly.
If initialization is not successful, start over from step 4.
Connect the L earphone with the R earphone.
-
7Take out both the L and R earphones and place them side by side.
-
Be careful not to touch the touch sensor area when taking them out.
The R indicator flashes twice every 5 seconds and the L indicator flashes quickly and repeatedly.
Initialization is now complete.
Information of all paired devices has been deleted. Pair the respective Bluetooth devices (device registration) again. Pairing for the First Time
If initialization fails, the R indicator won't flash twice every 5 seconds. In such case, start the initialization procedure again from the beginning.