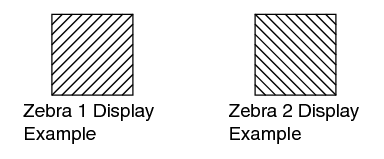
When the luminance level range for displaying zebra patterns is specified, diagonal lines (zebra pattern) are displayed at areas with the specified luminance levels during shooting.
Setting Zebra Pattern
Set the zebra display pattern.
Specify the brightness (luminance) level range for displaying zebra pattern.
Set the maximum brightness limit in [LCD/VF]  [Shooting Assist] [Zebra] [Top 1]/[Top 2], and the minimum brightness limit in [Bottom 1]/[Bottom 2].
|
Item |
Settings |
Options |
|---|---|---|
|
Top 1 |
Maximum brightness limit for displaying Zebra 1 |
5%, 10% to 95%, 98%, 100%, Over |
|
Bottom 1 |
Minimum brightness limit for displaying Zebra 1 |
0%, 5% to 95%, 98%, 100% |
|
Top 2 |
Maximum brightness limit for displaying Zebra 2 |
5%, 10% to 95%, 98%, 100%, Over |
|
Bottom 2 |
Minimum brightness limit for displaying Zebra 2 |
0%, 5% to 95%, 98%, 100% |
Memo
When [Zebra] is set to “1 Pattern”, “Top 2” and “Bottom 2” cannot be selected.
If the area specified by two zebra patterns overlaps, Zebra1 pattern will be displayed.
The timing to detect the zebra pattern display can be configured only when “J-Log1” or “HLG” is selected in [Color Space] and “Cam” or “Cam + Return” is selected in [Convert to ITU709].
Display the zebra pattern.
When the viewfinder is connected, the zebra pattern is displayed when the [ZEBRA] switch is set to “ON” or push down to “MOMENT”.
When the viewfinder is not connected, the zebra pattern is displayed using the user button assigned with “Zebra”.
During zebra pattern display,  (zebra icon) is displayed on the display screen in Camera mode.
Memo
When the viewfinder is connected, priority is given to the [ZEBRA] switch on the viewfinder so the user button assigned with “Zebra” will not function.
![]()