You can adjust the output value of the projected image with respect to the video signal input.
Adjusting the Output Value of the Projected Image (Gamma)
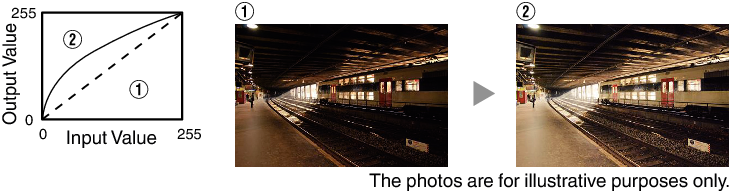
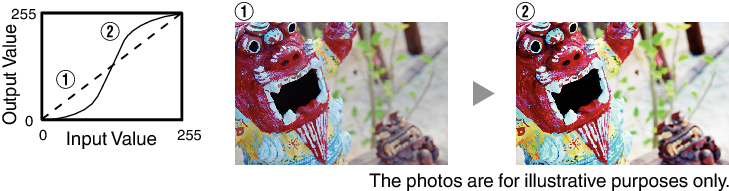
TOPExample of gamma adjustment
The overall image appear brighter with respect to the original image, making the dark areas more visible.
Increases the contrast with respect to the original image, creating a greater sense of depth.
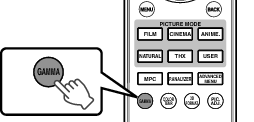
Press the [GAMMA] button
Pressing the [GAMMA] button each time switches the setting in sequence.
You can also perform setting from “Picture Adjust” ![]() “Gamma” in the menu.
“Gamma” in the menu.
The setting value varies with the model in use, as well as the “Picture Mode”.
If HDR (high dynamic range) signal is detected, the setting value may automatically switch to “D”.
If the setting value does not switch automatically when viewing HDR contents, try to set to “D” manually.
If the image appears dark after switching to “D”, it is recommended to adjust the image according to the procedures in Procedures for adjusting the image when gamma is set to “D”LINK.
Gamma Settings for Different “Color Profile” 
|
Color Profile |
Selectable Settings |
Description |
|---|---|---|
|
Standard |
Normal |
Recommended setting for normal viewing. |
|
A |
Places more emphasis on the gradation compared to the Normal setting. |
|
|
B |
Places more emphasis on the contrast compared to the Normal setting. |
|
|
C |
Places more emphasis on the brightness compared to the Normal setting. |
|
|
D |
Gamma suitable for viewing HDR (High Dynamic Range) content. |
|
|
Custom 1 to Custom 3 |
Fine-tunes the gamma setting according to the user’s preference. |
|
|
x.v.Color |
Normal* |
Recommended setting for normal viewing. |
When “Color Profile” is set to “x.v.Color”, the setting is fixed at “Normal”.
Gamma Settings for Different “Color Profile” 

|
Color Profile |
Selectable Settings |
Description |
|---|---|---|
|
Film 1 |
Film 1 |
Image is close to the characteristics of Eastman Kodak Company movie films. |
|
Film 2 |
Places more emphasis on the gradation compared to the “Film 1” setting. |
|
|
Custom 1 to Custom 3 |
Fine-tunes the gamma setting according to the user’s preference. |
|
|
Film 2 |
Film 1 |
Places more emphasis on the contrast compared to the “Film 2” setting. |
|
Film 2 |
Image is close to the characteristics of FUJIFILM Corporation movie films. |
|
|
Custom 1 to Custom 3 |
Fine-tunes the gamma setting according to the user’s preference. |
|
|
Film 3 |
Film 1 |
Places emphasis on the contrast. |
|
Film 2 |
Places emphasis on the gradation. |
|
|
Custom 1 to Custom 3 |
Fine-tunes the gamma setting according to the user’s preference. |
|
|
3D Film |
Film 1 |
Places emphasis on the contrast. |
|
Film 2 |
Places emphasis on the gradation. |
|
|
Custom 1 to Custom 3 |
Fine-tunes the gamma setting according to the user’s preference. |
|
|
Standard |
Normal |
Recommended setting for normal viewing. |
|
A |
Places more emphasis on the gradation compared to the Normal setting. |
|
|
B |
Places more emphasis on the contrast compared to the Normal setting. |
|
|
C |
Places more emphasis on the brightness compared to the Normal setting. |
|
|
D |
Gamma suitable for viewing HDR (High Dynamic Range) content. |
|
|
Custom 1 to Custom 3 |
Fine-tunes the gamma setting according to the user’s preference. |
|
|
x.v.Color |
Normal*1 |
Recommended setting for normal viewing. |
|
THX |
THX*2 |
Video of the THX standard. |
When “Color Profile” is set to “x.v.Color”, the setting is fixed at “Normal”.
When “Color Profile” is set to “THX”/“3D THX”, the setting is fixed at “THX”.