Registering the Access Points of the Camera to Connect ( ACCESS POINTS )
There are 4 ways to register the access points (wireless LAN router) for connection.
|
|
|
Wi-Fi Protected Setup (WPS) Registration
|
This is the easiest way of registration.
Authentication method and wireless LAN setup are performed automatically in WPS, allowing easy registration of connection settings between devices.
|
|
|
A search is conducted to locate access points. Select and register an access point from the list of search results.
|
|
|
Enter the name and authentication method manually to register an access point.
|
|
|
Enter the WPS PIN code of the camera to the access point to register.
|
By registering multiple access points, you can change connection to another access point by tapping on the desired one from the list.
Wi-Fi Protected Setup (WPS) Registration
Tap “MENU”.
(Operation on this camera)
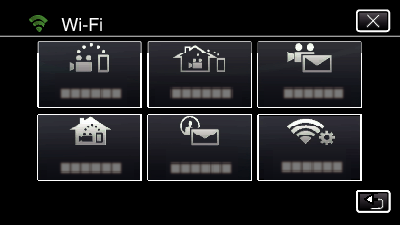
Tap the “Wi-Fi” (  ) icon.
(Operation on this camera)
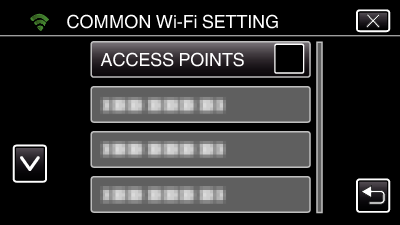
Tap “COMMON Wi-Fi SETTING”.
(Operation on this camera)
Tap “ACCESS POINTS”.
(Operation on this camera)
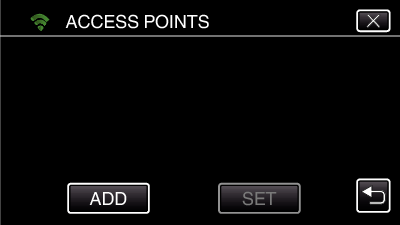
Tap “ADD”.
(Operation on this camera)
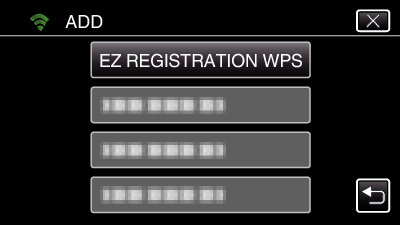
Tap “EZ REGISTRATION WPS”.
(Operation on this camera)
Activate WPS of the access point (wireless LAN router) within 2 minutes.
To activate WPS, refer to the instruction manual of the device in use.
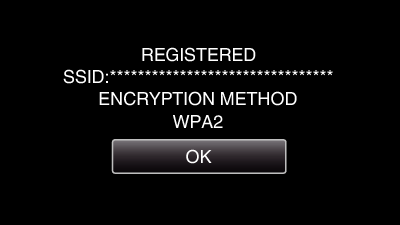
After registration is complete, tap “OK” on the camera’s screen.
(Operation on this camera)
Search and Register
Tap “MENU”.
(Operation on this camera)
Tap the “Wi-Fi” (  ) icon.
(Operation on this camera)
Tap “COMMON Wi-Fi SETTING”.
(Operation on this camera)
Tap “ACCESS POINTS”.
(Operation on this camera)
Tap “ADD”.
(Operation on this camera)
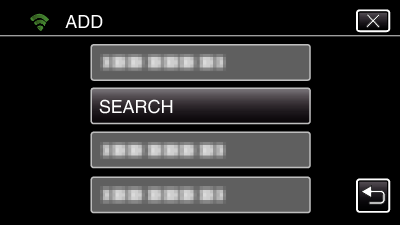
Tap “SEARCH”.
(Operation on this camera)
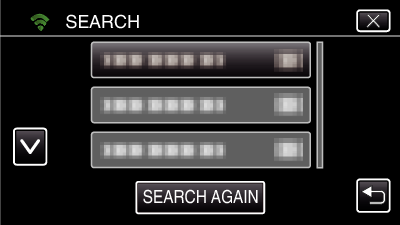
The search results appear on the camera’s screen.
Tap the name (SSID) of the desired access point from the list of search results.
(Operation on this camera)
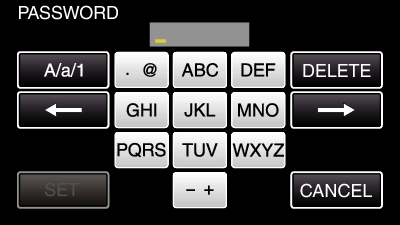
Register a password.
(Operation on this camera)
Tap on the on-screen keyboard to enter characters. The character changes with every tap.
“ABC”, for example, enter “A” by tapping once, “B” by tapping twice, or “C” by tapping 3 times.
Tap “DELETE” to delete a character.
Tap “A/a/1” to select character input type from upper case letter, lower case letter, and number.
Tap  or
or  to move one space to the left or right.
The password is not required if the wireless LAN router is not security protected.
After registration is complete, tap “OK” on the camera’s screen.
(Operation on this camera)
Manual Registration
Tap “MENU”.
(Operation on this camera)
Tap the “Wi-Fi” (  ) icon.
(Operation on this camera)
Tap “COMMON Wi-Fi SETTING”.
(Operation on this camera)
Tap “ACCESS POINTS”.
(Operation on this camera)
Tap “ADD”.
(Operation on this camera)
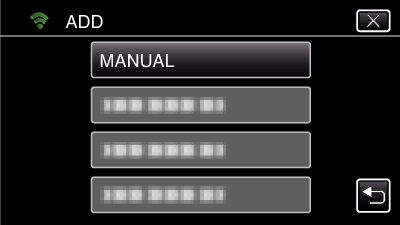
Tap “MANUAL”.
(Operation on this camera)
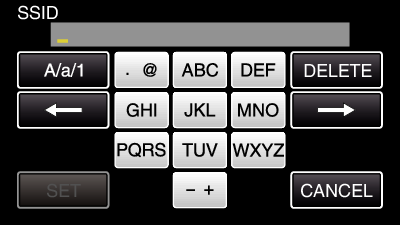
Enter the name (SSID) of the access point (wireless LAN router) and tap “SET”.
(Operation on this camera)
Tap on the on-screen keyboard to enter characters. The character changes with every tap.
“ABC”, for example, enter “A” by tapping once, “B” by tapping twice, or “C” by tapping 3 times.
Tap “DELETE” to delete a character.
Tap “A/a/1” to select character input type from upper case letter, lower case letter, and number.
Tap  or
or  to move one space to the left or right.
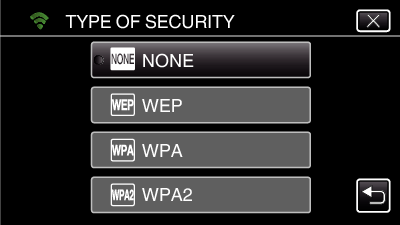
Select the type of authentication method (security).
(Operation on this camera)
Select according to the setting of your router.
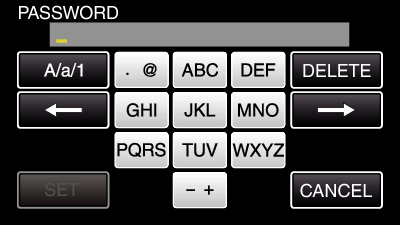
When authentication method is not set to “NONE”, enter a password and tap “SET”.
(Operation on this camera)
Tap on the on-screen keyboard to enter characters. The character changes with every tap.
“ABC”, for example, enter “A” by tapping once, “B” by tapping twice, or “C” by tapping 3 times.
Tap “DELETE” to delete a character.
Tap “A/a/1” to select character input type from upper case letter, lower case letter, and number.
Tap  or
or  to move one space to the left or right.
After registration is complete, tap “OK” on the camera’s screen.
(Operation on this camera)
WPS PIN Registration
Tap “MENU”.
(Operation on this camera)
Tap the “Wi-Fi” (  ) icon.
(Operation on this camera)
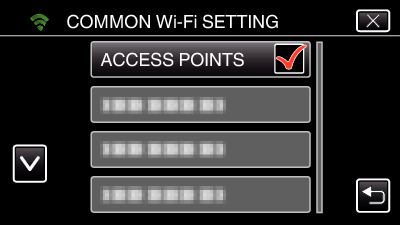
Tap “COMMON Wi-Fi SETTING”.
(Operation on this camera)
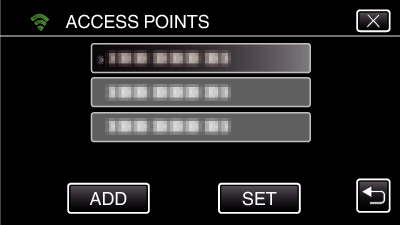
Tap “ACCESS POINTS”.
(Operation on this camera)
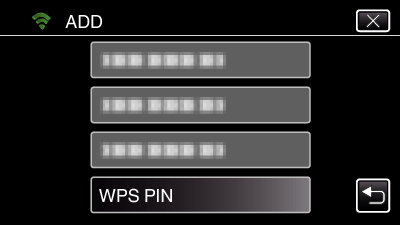
Tap “ADD”.
(Operation on this camera)
Tap “WPS PIN”.
(Operation on this camera)
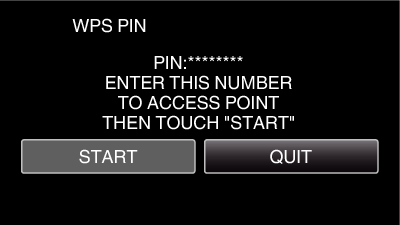
Enter the PIN code displayed on the camera to the access point (wireless LAN router).
For details on how to enter the PIN code, refer to the instruction manual of the device in use.
Tap “START”.
(Operation on this camera)
Tap “START” after entering PIN code to the wireless LAN router.
(Connection cannot be established if “START” is tapped before entering the code.)
After registration is complete, tap “OK” on the camera’s screen.
(Operation on this camera)
Editing LAN Settings of Access Points (Wireless LAN Router)
Change accordingly such as when you want to fix the IP address for the camera.
Tap “MENU”.
(Operation on this camera)
Tap the “Wi-Fi” (  ) icon.
(Operation on this camera)
Tap “COMMON Wi-Fi SETTING”.
(Operation on this camera)
Tap “ACCESS POINTS”.
(Operation on this camera)
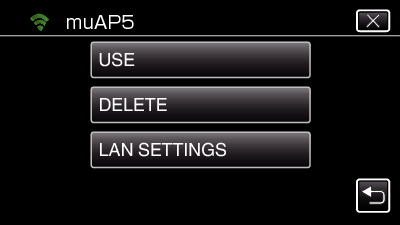
Tap the access point for changing the settings.
(Operation on this camera)
Tap “LAN SETTINGS”.
(Operation on this camera)
Tap “USE” to use the selected access point.
Tap “DELETE” to delete the registered access point.
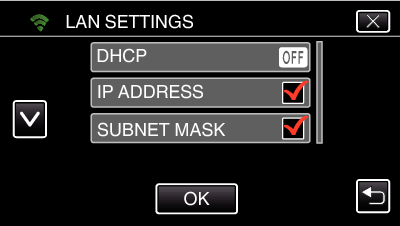
Perform the LAN settings. (when “DHCP” is set to “OFF”)
(Operation on this camera)
LAN settings comprise of the following items.
|
|
|
|
|
ON: Obtains IP address from the DHCP server automatically.
OFF: Settings of “IP ADDRESS”, “SUBNET MASK”, “DEFAULT GATEWAY”, “PRIMARY DNS”, and “SECONDARY DNS” are required.
|
|
|
|
|
|
|
|
|
Enter the default gateway.
|
PRIMARY DNS /
SECONDARY DNS
|
Enter the IP addresses of the primary and secondary DNS servers.
|


_IZYUILvdsdgwox.png)
_UJDCILkrscevgk.png)
