
Main Page >
Getting Started > Clock Setting
Getting Started |
Clock Setting |
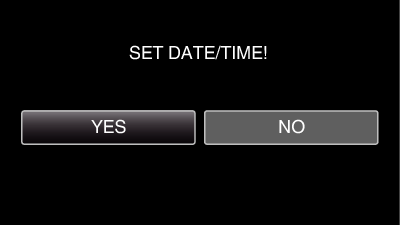
The “SET DATE/TIME!” screen appears when you turn on this unit for the first time after purchase, when it has not been used for a long time, or when the clock is not set yet.
Set the clock before recording.
- 1
- 2
- 3
- 4
- 5

Open the LCD monitor.

The unit turns on.
When the LCD monitor is closed, the unit turns off.

Tap “YES” when “SET DATE/TIME!” is displayed.

Set the date and time.
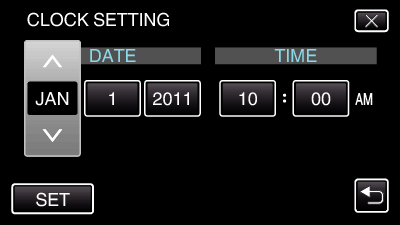
When the year, month, day, hour, or minute item is tapped, “∧” and “∨” will be displayed.
Tap ∧ or ∨ to adjust the year, month, day, hour, and minute.

After setting the date and time, tap “SET”.

Select the region where you live and tap “SAVE”.
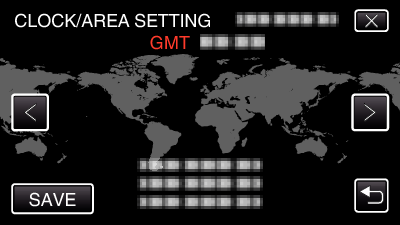
The city name and time difference are displayed.
Tap < or > to select the city name.
Memo
- The clock can be reset again later.
- When using this unit overseas, you can set it to the local time for recording.
- “SET DATE/TIME!” is displayed when you turn on this unit after it has not been used for a prolonged period.
Connect the AC adapter for more than 24 hours to charge the internal clock battery of this unit before setting the clock.