Sets the dynamic DNS information of the obtained account on the camera.
-

- Using Wi-Fi (GZ-EX355/GZ-EX310)
- Changing the Settings
-
Setting Dynamic DNS on this Camera (OUTDOOR MONITORING)
Setting Dynamic DNS on this Camera ( OUTDOOR MONITORING )
Tap “MENU”.
(Operation on this camera)
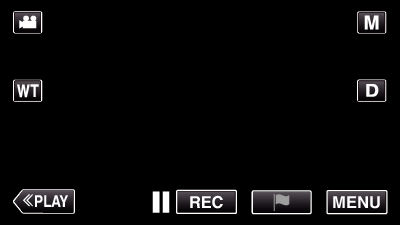
The top menu appears.
Tap the “Wi-Fi” (  ) icon.
(Operation on this camera)
_UJDCILaupoooxz.png)
Tap “OUTDOOR MONITORING” (  ).
).
(Operation on this camera)
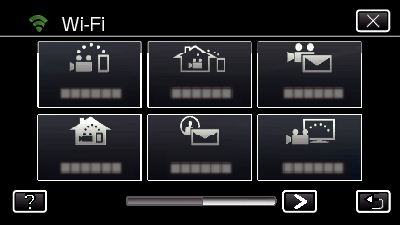
Tap “DDNS SETTING”.
(Operation on this camera)
Tap “DDNS”, then tap “ON”.
(Operation on this camera)
Enter the DDNS settings (username/password).
(Operation on this camera)
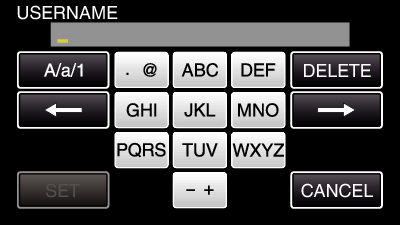
Tap on the on-screen keyboard to enter characters. The character changes with every tap.
“ABC”, for example, enter “A” by tapping once, “B” by tapping twice, or “C” by tapping 3 times.
Tap “DELETE” to delete a character.
Tap “CANCEL” to exit.
Tap “A/a/1” to select character input type from upper case letter, lower case letter, and number.
Tap ![]() or
or ![]() to move one space to the left or right.
to move one space to the left or right.
After setting, tap “SET”.
Memo
Only the JVC dynamic DNS service can be set on this camera.