
Playback |
Playing Back Playlists |
Play back the playlists that you have created.
- 1
- 2
- 3
- 4
- 5

Select the playback mode.
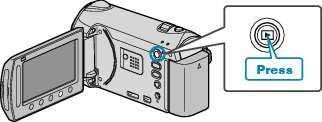

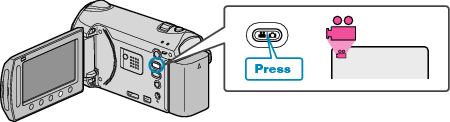
Select video mode.

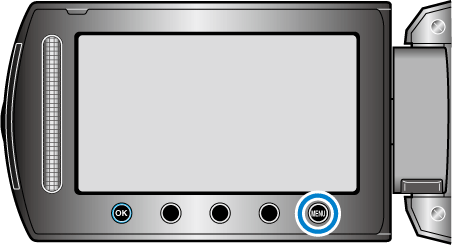
Touch  to display the menu.

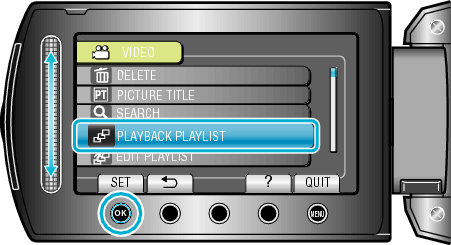
Select “PLAYBACK PLAYLIST” and touch  .
.

Select the desired playlist and touch to start playback.
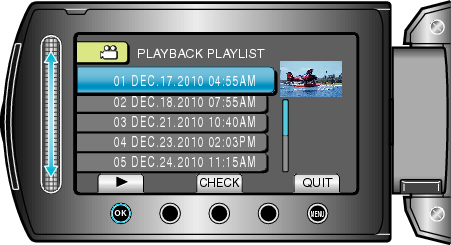
Touch “CHECK” to check the content of the selected playlist.
To exit the playback, touch ![]() .
.