
Copying |
Dubbing Files to a Disc by Connecting to a DVD Recorder |
You can dub videos in standard quality by connecting to a DVD recorder.
Refer also to the instruction manuals of the TV and DVD recorder.
- 1
- 2
- 3
- 4
- 5
- 6

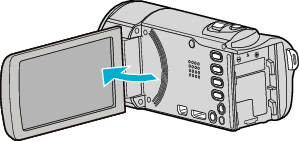
Open the LCD monitor.

Connect to a DVD recorder.
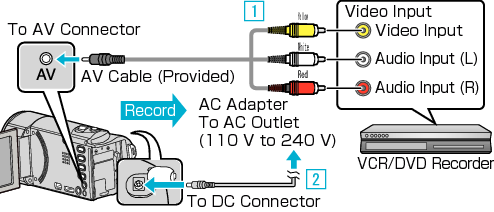

Connect using the provided AV cable.

Connect the AC adapter to this unit.
This unit powers on automatically when the AC adapter is connected.
Be sure to use the supplied AC adapter.

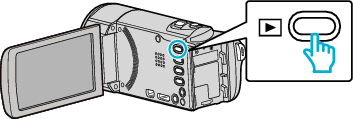
Select the playback mode.

Prepare the TV/DVD recorder for recording.
Switch to a compatible external input.
Insert a disc (DVD-R, etc.) into the DVD recorder.

Prepare this unit for playback.
Set “VIDEO OUTPUT” in the “CONNECTION SETTINGS” menu to the aspect ratio ( “4:3” or “16:9”) of the connecting TV.
To include the date and time during dubbing, set “DISPLAY ON TV” in the “CONNECTION SETTINGS” menu to “ON”.
Set “DISPLAY DATE/TIME” in the playback menu to “ON”.

Start recording.
Start playback on this unit and press the record button on the recorder.
After playback is complete, stop the recording.
Caution
- File copying by connecting this unit to a DVD writer is not supported.