
Menu Settings |
TOUCH SCREEN ADJUST |
Adjusts the response position of the buttons on the touch screen.
- 1
- 2
- 3
- 4
- 5
- 6

Tap “MENU”.
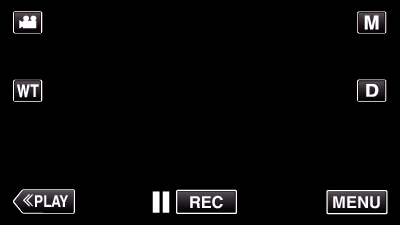
When entering from the recording mode, tap “MENU” again as the shortcut menu appears.

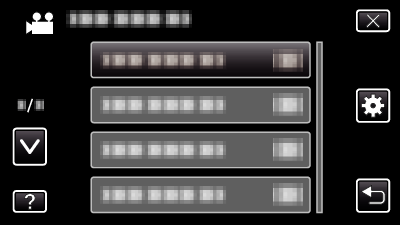
Tap “  ”.
”.

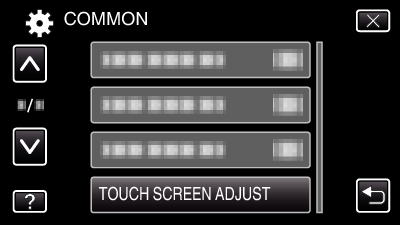
Tap “TOUCH SCREEN ADJUST”.
The touch screen adjustment screen appears.

Tap “+”. (3 times in total)

Keep tapping “+” as its position changes with every tap.

Tap “+” again to confirm the adjusted positions. (3 times in total)
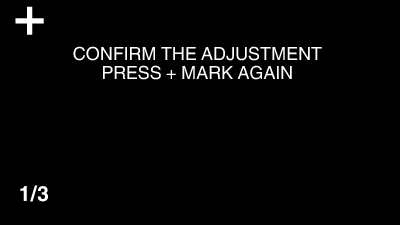
Keep tapping “+” as its position changes with every tap.
If areas on the adjustment screen other than the “+” mark are tapped, errors will occur. In this case, try again from step 4.

Tap “OK”.

Setting ends and returns to the menu screen.
Caution
- Do not tap areas other than the “+” mark during touch screen adjustment (steps 4 - 5). Doing so may cause the touch screen to malfunction.
Memo
- Adjust by lightly tapping with the stylus pen.
- Do not press with an object with a sharp tip or do not press hard.