
Using Wi-Fi |
Registering the Recipient’s E-mail Address |
Registers the e-mail addresses of recipients on the camera.
- 1
- 2
- 3
- 4
- 5
- 6
- 7

Tap “MENU”.
(Operation on this camera)
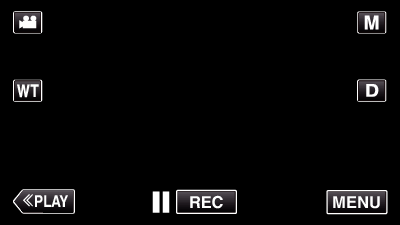
The shortcut menu appears.

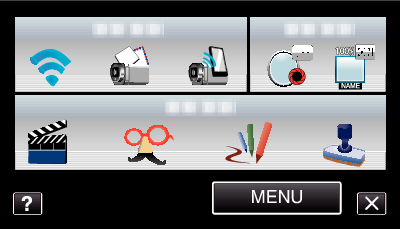
Tap “Wi-Fi” (  ) in the shortcut menu.
(Operation on this camera)

Tap “NETWORK SETTINGS”.
(Operation on this camera)


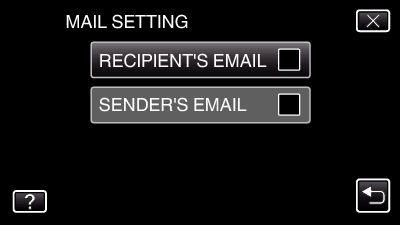
Tap “MAIL SETTING”.
(Operation on this camera)


Tap “RECIPIENT'S EMAIL”.
(Operation on this camera)

Tap “ADD”.
(Operation on this camera)
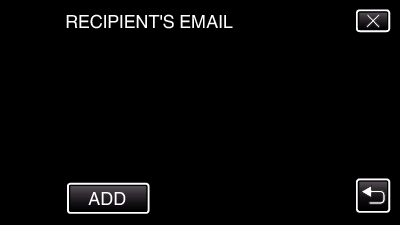

Enter the recipient’s e-mail address.
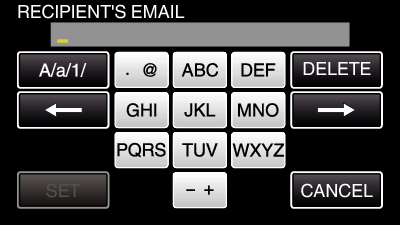
Tap on the on-screen keyboard to enter characters. The character changes with every tap.
Tap “DELETE” to delete a character.
Tap “CANCEL” to exit.
Tap “A/a/1” to select character input type from upper case letter, lower case letter, and number.
Tap ![]() or
or ![]() to move one space to the left or right.
to move one space to the left or right.
After setting, tap “SET”.
Memo
- Up to 8 e-mail addresses can be registered as recipients.
Caution
- When setting another person as the recipient, be sure to obtain his/her consent in advance.
- Check whether notifications indicating errors have been sent to the sender’s e-mail address. (Make use of a computer or similar devices as it is not possible to check from the camera.)
If no notifications are received: Refer to “Unable to send e-mails.” and adjust the settings accordingly.
If notifications are received: Check the content of the notification.
*Note
Do not continue sending e-mails with the same settings if you receive error notifications. Depending on the provider, you may be marked as a sender of spam (junk mail).