Clean the filter every 2000 hours (more often in dusty conditions). Using a filter without cleaning may reduce the brightness of the image. Dirt that enters the unit may also appear as shadows on the image.
Cleaning and Replacing the Filter
TOPReplacing the Filter 


Loosen the screws at the four corners and remove the cover
The screws cannot be removed from the cover. Do not try to remove the screws from the cover by force.
Remove the sponge filter
Use a vacuum cleaner to remove dirt from the sponge filter carefully
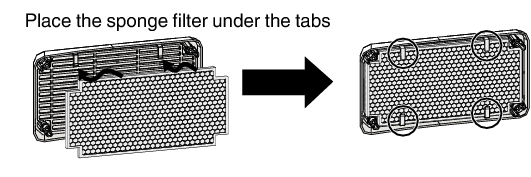
Restore the sponge filter to the original position
Restore the cover and fasten the screws at the four corners
MEMO
If the sponge filter is damaged and requires replacement, or if dirt gets into the unit, consult your authorized dealer or nearby service center.
Sponge spacer
Product no.: J3K-0134-00
Replacing the Filter 

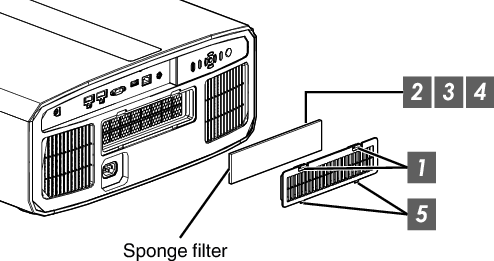
Press down the two tabs on the cover and pull the cover out to remove the cover
Remove the sponge filter
Use a vacuum cleaner to remove dirt from the sponge filter carefully
Restore the sponge filter
Insert the catches at the bottom of the cover into the holes on the unit and replace the cover
MEMO
Be sure to attach the filter. Using this unit without attaching the filter may cause unexpected malfunction.
Sponge filter
Product no.: J3K-0094-00