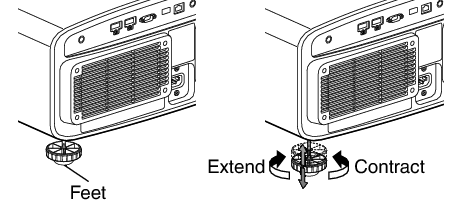
The height and inclination of the unit (0 to 5 mm (0 to 0.2 in)) can be adjusted by turning the feet.
Lift the unit and adjust the four feet.
Adjusting the Position
TOPAdjusting the elevation angle of the projector

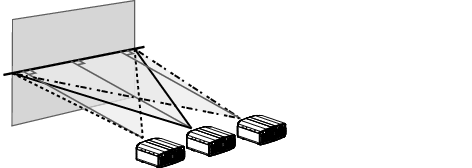
Adjusting the position of the image
By using the lens shift feature of this unit, you can shift the image upward/downward or to the left/right. Set it to your preferred position.
Horizontal Position
Vertical Position: 0% (Center)
Up to about 43% ![]()
![]() and 34%
and 34% ![]()
![]()
![]()
![]()
![]()
![]() of the projected image *
of the projected image *
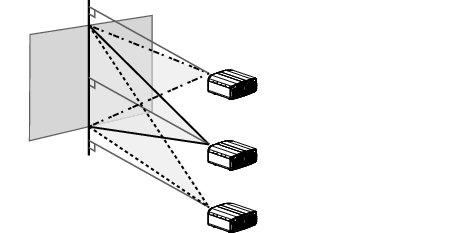
Vertical Position
Horizontal Position: 0 % (Center)
Up to about 100% ![]()
![]() and 80%
and 80% ![]()
![]()
![]()
![]()
![]()
![]() of the projected image *
of the projected image *
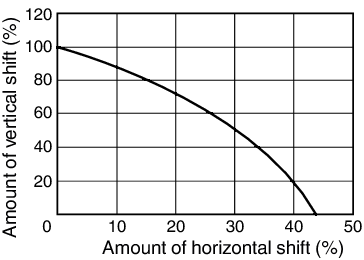
16:9 image
Lens Shift Range (16:9)
![]()
![]()
![]()
![]()
![]()
![]()
![]()
![]()
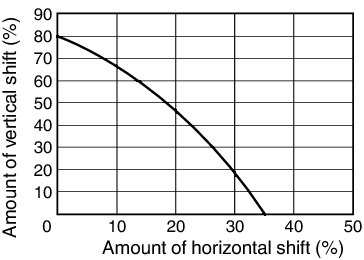
The maximum vertical shift varies with the amount of horizontal shift. Similarly, the maximum horizontal shift also changes with the amount of vertical shift.
The values on the graph are intended as a guide. Use them for reference during installation.