> Connecting (Power On) > Pairing (Registering a device)
Pairing (Registering a device)
The method of operation varies depending on the connection.
Pairing for the First Time
-
1Take out both the L (left) and R (right) earphones.
-
Be careful not to touch the touch sensor area when taking them out.
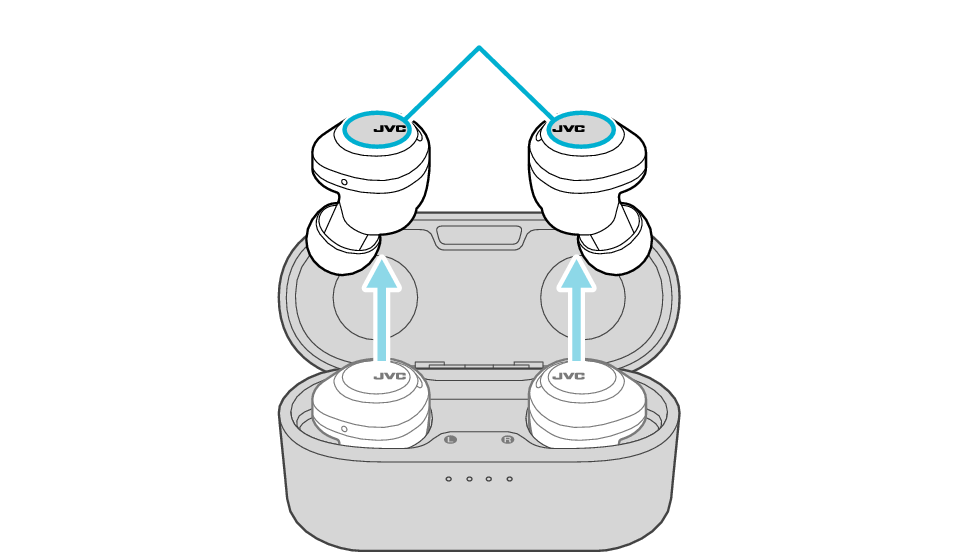
Touch sensor area
-
After the earphones are taken out, the L and R indicators will flash, and the power turns on automatically.
-
When the L and R earphones are connected, the R indicator will flash slowly and repeatedly twice.
-
After a short while, the L indicator starts to flash quickly and repeatedly, and a voice message saying “Pairing” can be heard.
When there is an interval between the timing when the L and R earphones are taken out from the charging case, connection between them may fail. In this case, put the earphones back into the charging case, wait till their power goes off and repeat the steps again.
Either the L or R earphone will be the base unit connecting to the BLUETOOTH device and the other earphone.
-
-
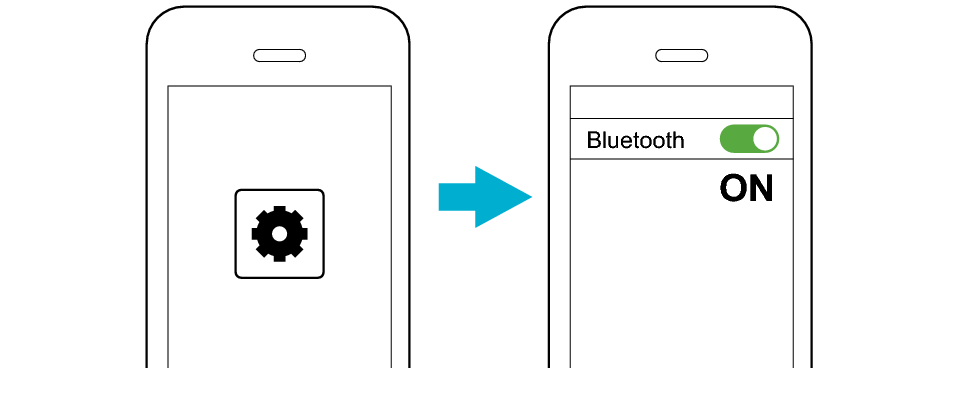
2Turn on the Bluetooth function of the BLUETOOTH device.
-
-
3Select “JVC HA-FW1000T” from the device list.
-
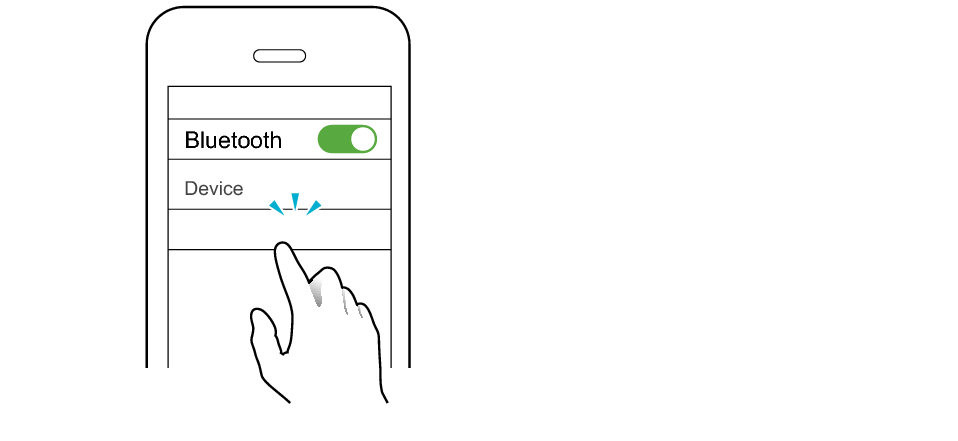
JVC HA-FW1000T
After connection is established, both the L and R indicators will flash every 5 seconds, and the earphones can now be used for listening to music.
If connection (pairing) is not completed within 5 minutes after the indicator starts flashing, the earphone automatically turns itself off.
-
1Wear the earphones while the power is turned off. Touch and hold the L (left) and R (right) touch sensor areas for about 3 seconds.
-
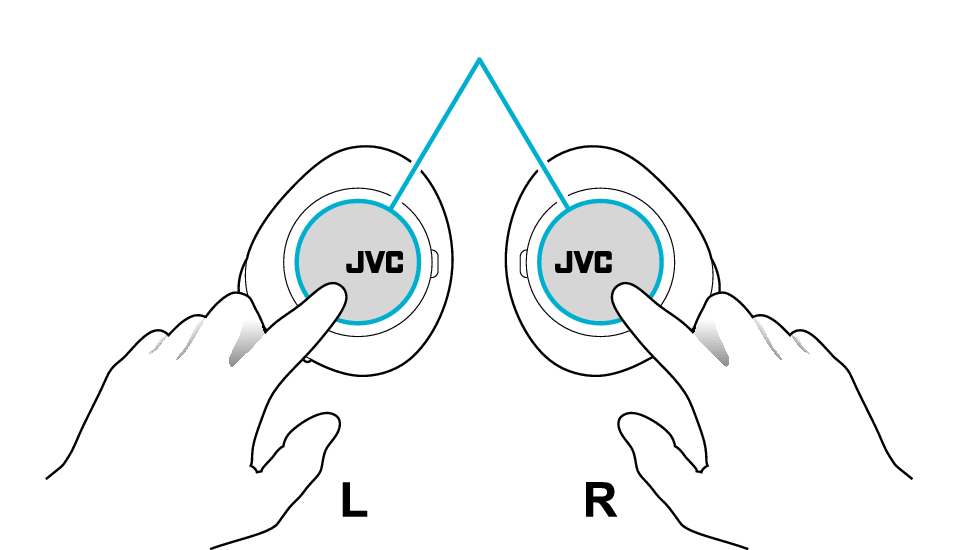
Touch sensor area
-
2The power of the L and R earphones turns on. When the L indicator starts to flash quickly and repeatedly (or when a voice message saying “Pairing” is heard), release your fingers from the buttons.
-
When the L indicator flashes slowly, touch and hold the touch sensor area for about 3 seconds to turn off the power. Touch and hold the touch sensor area until the indicator starts to flash quickly again.
-
3Turn on the Bluetooth function of the BLUETOOTH device.
-
-
4Select “JVC HA-FW1000T” from the device list.
-
JVC HA-FW1000T
After connection is established, both the L and R indicators will flash every 5 seconds, and the earphones can now be used for listening to music.
If connection (pairing) is not completed within 5 minutes after the indicator starts flashing, the earphone automatically turns itself off.
Pairing the Second and Subsequent Devices
-
1Turn off the Bluetooth function of the device that was last paired.
-
2Take out both the L (left) and R (right) earphones.
-
Be careful not to touch the touch sensor area when taking them out.
Touch sensor area
-
After the earphones are taken out, the L and R indicators will flash, and the power turns on automatically.
-
The L and R indicators flashes slowly and repeatedly twice.
-
After a while, either the L or R indicator will flash quickly and repeatedly and an audio message saying “Pairing” can be heard.
When there is an interval between the timing when the L and R earphones are taken out from the charging case, connection between them may fail. In this case, put the earphones back into the charging case, wait till their power goes off and repeat the steps again.
-
-
3Turn on the Bluetooth function of the BLUETOOTH device.
-
-
4Select “JVC HA-FW1000T” from the device list.
-
JVC HA-FW1000T
After connection is established, both the L and R indicators will flash every 5 seconds, and the earphones can now be used for listening to music.
If connection (pairing) is not completed within 5 minutes after the indicator starts flashing, the earphone automatically turns itself off.
-
1Turn off the Bluetooth function of the device that was last paired.
-
2Wear the earphones while the power is turned off. Touch and hold the L (left) touch sensor area for about 5 seconds.
-
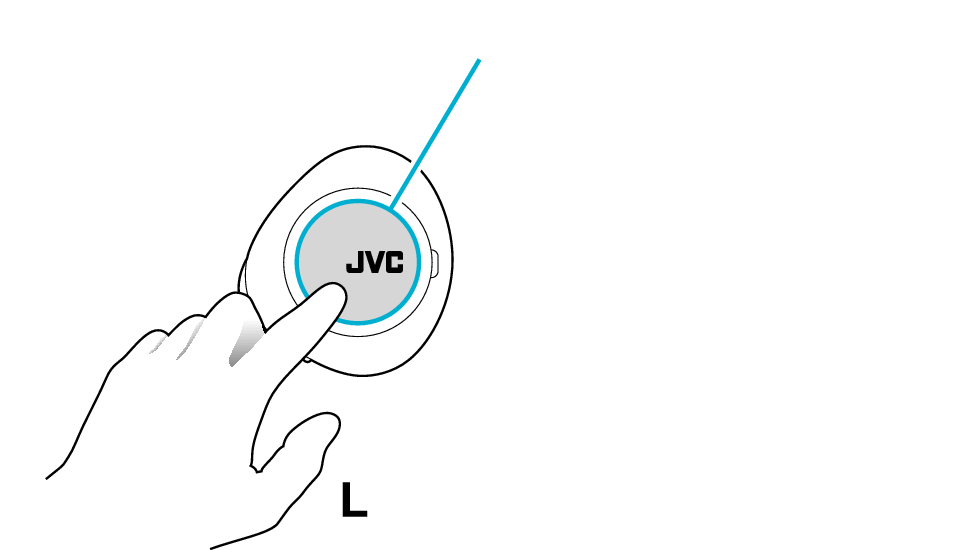
Touch sensor area
-
3When the power of the L earphone turns on and the L indicator starts to flash quickly and repeatedly (or when a voice message saying “Pairing” is heard), release your finger from the button.
-

-
4Turn on the Bluetooth function of the BLUETOOTH device.
-
-
5Select “JVC HA-FW1000T” from the device list.
-
JVC HA-FW1000T
When the L earphone is successfully connected to the device, the L indicator starts to flash every 5 seconds.

-
6Touch and hold the R (right) touch sensor area for about 3 seconds. Release your finger after the R indicator lights up. The R earphone turns on and gets connected to the L earphone.
-
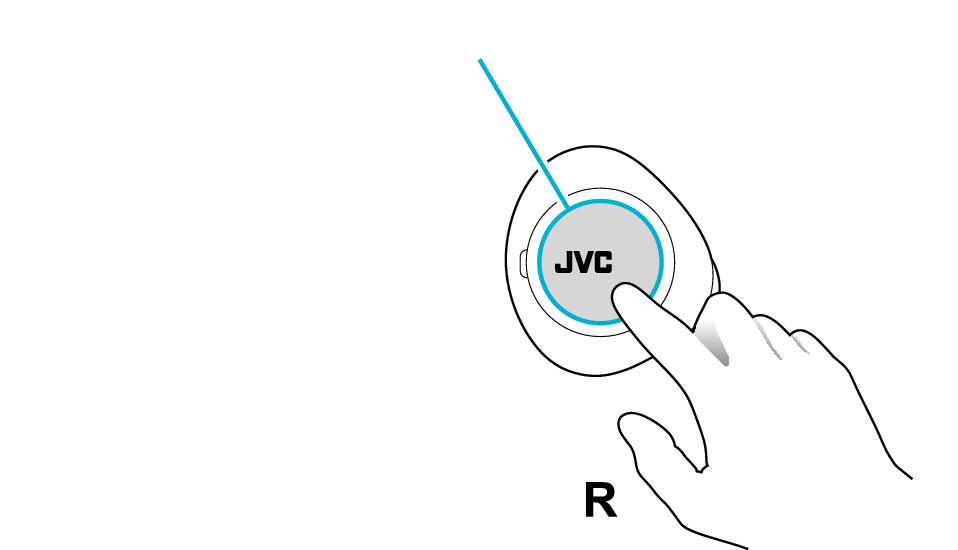
Touch sensor area
After connection is established, the R indicator will flash every 5 seconds, and the earphones can now be used for listening to music.
If they are not connected, put the earphones back into the charging case, wait till their power goes off and repeat the steps again.
If connection (pairing) is not completed within 5 minutes after the indicator starts flashing, the earphone automatically turns itself off.