JVC Global

Global

HD MEMORY CAMERA GZ-HM340/GZ-HM320/GZ-HM300
  • Print This Section
  • Select and Print Page
0201-0200

  • Site Map
  • Index

Beginner's Guide

Useful Shooting Techniques

Storage of Files

  • Getting Started
  • Recording
  • Playback
  • Editing
  • Copying
  • Menu Settings
  • Back to Main

  • Verifying the Accessories
  • Charging the Battery Pack
  • Grip Adjustment
  • Inserting an SD Card (GZ-HM340/GZ-HM320)
  • Inserting an SD Card (GZ-HM300)
  • Clock Setting
  • Using the Operation Buttons
  • Using the Slider
  • Holding this Unit
  • Attaching the Lens Cap
  • Tripod Mounting
  • Using this Unit Overseas
  • Optional Accessories
  • Taking Videos in Auto Mode
  • Taking Still Images in Auto Mode
  • Manual Recording
  • Registering Files to Events Before Recording
  • Taking Videos in YouTube™ Format
  • Recording at Intervals (TIME-LAPSE RECORDING)
  • Recording Automatically by Sensing Movements (AUTO REC)
  • Remaining Recording Time/Battery Power
  • Playing Back Videos
  • Playing Back Still Images
  • Searching for a Specific Video/Still Image
  • Connecting to and Viewing on TV
  • Playing Back Playlists
  • Deleting Unwanted Files
  • Protecting Files
  • Changing Event Registration of Videos
  • Dividing Files
  • Face Detection Zoom
  • Capturing a Still Image in the Video during Playback
  • Capturing a Required Part in the Video
  • Capturing Videos for Uploading to YouTube™
  • Creating a Playlist with Title (GZ-HM340/GZ-HM320)
  • Creating Playlists from the Recorded Videos
  • Combining Videos Recorded by Seamless Recording
  • Copying Files to Card
  • Moving Files
  • Creating a Disc Using a Connected Blu-ray Recorder
  • Dubbing Files to a DVD Recorder or VCR
  • Copying to Windows PC
  • Copying to Mac Computer
  • Operating the Menu
  • Recording Menu (Video)
  • Recording Menu (Still Image)
  • Manual Settings Menu
  • Playback Menu (Video)
  • Playback Menu (Still Image)
  • Display Settings Menu
  • CLOCK ADJUST
  • Basic Settings Menu
  • Connection Settings Menu
  • Media Settings Menu
Main Page> Recording> Taking Videos in Auto Mode> Capturing Still Images During Video Recording

Recording

Capturing Still Images During Video Recording

  • Taking Videos in Auto Mode
  • Zooming
  • Capturing Still Images During Video Recording
  • Reducing Camera Shake
  • Checking the Captured Image Immediately
  • Taking Still Images in Auto Mode
  • Zooming
  • Checking the Captured Image Immediately
  • Manual Recording
  • Scene Selection
  • Adjusting Focus Manually
  • Using Focus Assist
  • Adjusting Brightness
  • Setting White Balance
  • Setting Backlight Compensation
  • Setting Metering Area
  • Recording with Effects
  • Taking Close-up Shots
  • Registering Files to Events Before Recording
  • Taking Videos in YouTube™ Format
  • Recording at Intervals (TIME-LAPSE RECORDING)
  • Recording Automatically by Sensing Movements (AUTO REC)
  • Remaining Recording Time/Battery Power
  • Names of Parts
  • Indications on the LCD Monitor
  • Troubleshooting
  • Maintenance
  • Specifications

Still images can be captured by pressing the SNAPSHOT button while in the video mode (standby or recording).

Snapshot recording

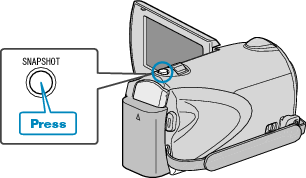
"PHOTO" lights up on the screen when a still image is being captured.

Capturing still image

The still images captured during video recording are saved to the destination set in media settings.

  • REC MEDIA FOR IMAGE (GZ-HM340/GZ-HM320)
  • IMAGE SLOT SELECTION (GZ-HM300)

Memo

  • The picture quality varies with the “IMAGE QUALITY” setting.
    • Changing Still Image Picture Quality
Back to Main
Return to Top
JVC Global TOP (English Only) JVC Worldwide Sites (English Only) Contact & Support (English Only)
Terms of Use
© 2011 JVCKENWOOD Corporation