
Playback |
Playing Back Videos |
You can select and play back the recorded videos from an index screen (thumbnail display).
- 1
- 2
- 3

Open the LCD monitor.
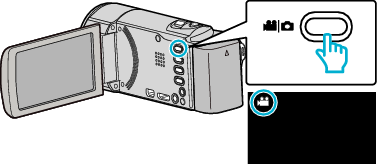
Check if the recording mode is ![]() .
.
If the mode is ![]() still image, tap
still image, tap ![]() on the recording screen to display the mode switching screen.
on the recording screen to display the mode switching screen.
Tap ![]() to switch the mode to video. (You can also use the
to switch the mode to video. (You can also use the ![]() /
/ ![]() button on this unit.)
button on this unit.)

Tap “<<PLAY” to select the playback mode.
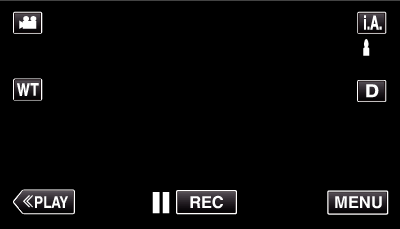

Tap on the file to start playback.
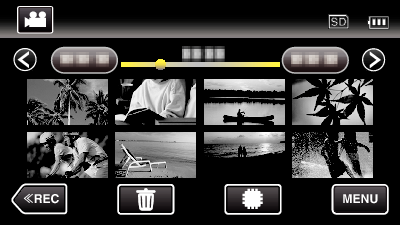
Tap ![]() /
/ ![]() to select the media for playback and change the index screen (thumbnail display). (GZ-EX250)
to select the media for playback and change the index screen (thumbnail display). (GZ-EX250)
Tap ![]() to pause.
to pause.
Tap ![]() to return to the index screen.
to return to the index screen.
![]() appears on the last image played back.
appears on the last image played back.
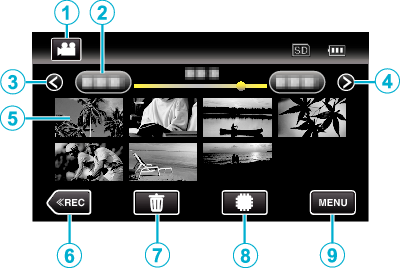
Operation Buttons for Video Playback
During Index Screen Display
| Display | Description | |
|---|---|---|
 |
Video/Still Image Mode |
Switches between video and still image modes. |
 |
Date |
Moves to the previous/next date |
 |
< |
Displays the previous index screen (thumbnail display) You can perform the same operation with the zoom lever. |
 |
> |
Displays the next index screen (thumbnail display) You can perform the same operation with the zoom lever. |
 |
Thumbnail (File) |
Tap on thumbnail - Starts playback |
 |
<<REC |
Switches to the recording mode. |
 |
|
Displays the index screen (thumbnail display) to perform deletion |
 |
|
Switches between the index screen of the built-in memory and SD card |
 |
MENU |
Displays the menu screen |
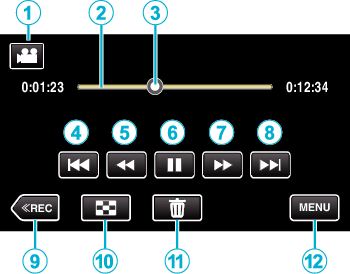
During Video Playback
| Display | Description | |
|---|---|---|
| |
Video/Still Image Mode |
Switches between video and still image modes. |
| |
Timeline Bar |
Tap on a random position - Moves to the tapped position |
| |
Pointer |
Displays the current estimated playback position within the scene |
| |
|
Returns to the beginning of the scene Returns to the previous scene if tapped at the beginning of a scene. You can perform the same operation with the zoom lever. |
| |
|
Reverse search (speed increases with each tap) |
| |
|
Reverse slow-motion / Press and hold to start reverse slow playback |
| |
|
Playback/pause |
| |
|
Forward search (speed increases with each tap) |
| |
|
Forward slow-motion / Press and hold to start slow playback |
| |
|
Advances to the next scene You can perform the same operation with the zoom lever. |
| |
<<REC |
Switches to the recording mode. |
 |
|
Stop (returns to index screen) |
 |
|
Deletes the currently displayed video. |
 |
MENU |
Displays the menu screen |
Memo
- Tap or drag on the operation area of the touch screen.
- Operations buttons on the touch screen disappear if the unit is not operated for about 5 seconds. Tap on the screen to display the operation buttons again.
- You can search for a specific file by the recording date.
- The recording date and time can be displayed on the screen during playback.

Caution
- Make a backup of important recorded data.
It is recommended to copy your important recorded data to a DVD or other recording media for storage. - This unit is a microcomputer-controlled device. Electrostatic discharge, external noise and interference (from a TV, a radio, etc.) might prevent it from functioning properly. In such a case, turn off the power, then remove the AC adapter and battery pack. This unit will be reset.
- Make a backup of important recorded data.
- It is recommended to copy your important recorded data to a DVD or other recording media for storage.
- JVC will not be responsible for any lost data.