Viewing Videos
TOP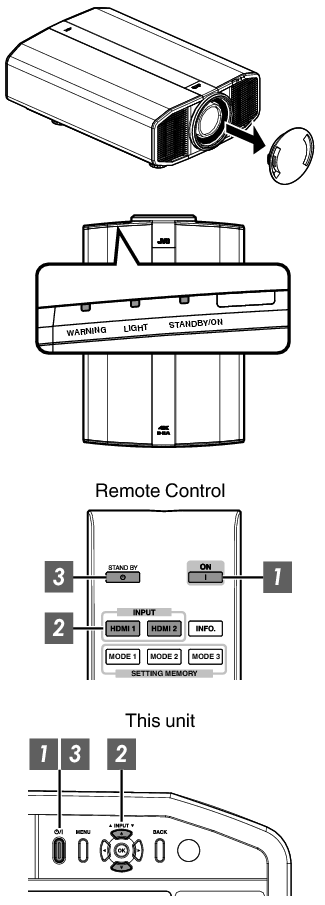
Make sure to remove the lens cover.
Connect the power cord, and ensure that the “STANDBY/ON” indicator lights up in red.
During standby in the “ECO Mode”, the “STANDBY/ON” indicator does not light up even when the power cord is correctly connected.
In this case, cancel the standby mode by pressing any button on the remote control unit, or use the ![]() button on the projector unit when you are turning on the power.
button on the projector unit when you are turning on the power.
Remote control: press the ![]() [ON] button
[ON] button
Projector unit: press the ![]() button
button
The “STANDBY/ON” indicator light switches from red (light off in “ECO Mode”) to green (light goes off after the unit starts up).

Remote control: press the [HDMI 1] or [HDMI 2] button
Projector unit: press the [INPUT] button to switch the input
Play back the selected device to project the image.
Press the [HIDE] button on the remote control
The “STANDBY/ON” indicator light starts to blink in green.
Press the [HIDE] button again to resume display of the image.
The power cannot be turned off when the image is temporarily hidden.
Remote control: press the ![]() [STANDBY] button
[STANDBY] button
Projector unit: press the ![]() button
button
While the “Are you sure you want to turn off?” message is displayed, press the button again.
The light of the LD block goes off, and the “STANDBY/ON” indicator switches from a green light to a red blinking light.
After the light goes off, the fan will run for about 10 seconds to cool down the LD block (Cool-down mode). Do not disconnect the power cable while cooling is in progress.
After about 10 seconds, the “STANDBY/ON” indicator switches from a blinking red to a solid red light.

Attach the lens cover.
The power cannot be turned off within approximately 30 seconds after it has been turned on.
The power cannot be turned on again while cooling is in progress (10 seconds).
Pull out the power plug when the unit is not to be used for a prolonged period of time.
If the indication of indicator differs from the description, refer to Indicator Display on the Main UnitLINK for details.