The screen size of the projected image can be adjusted optimally according to the original screen size (aspect) that has been input.
Adjusting the Screen Size (Aspect)
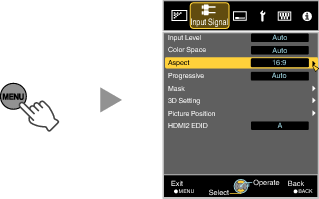
TOPPress the [MENU] button to display the menu
Select “Input Signal”  “Aspect” in the menu, then select the setting and press [OK]
|
Setting |
Description |
|
|---|---|---|
|
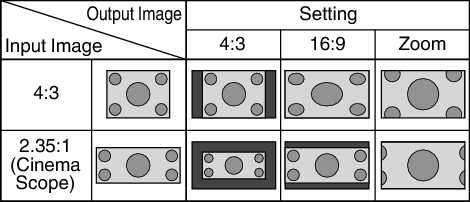
4:3 |
Sets the screen size to 4:3. For HD signals, the two sides are reduced. |
Displayed only during video signal input. |
|
16:9 |
Sets the screen size to 16:9. For SD signals, the two sides are expanded. |
|
|
Zoom |
Enlarges the entire image. Not selectable in the case of HD signals. |
|
|
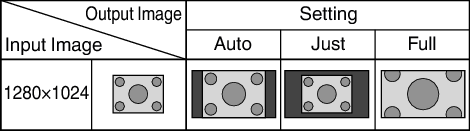
Auto |
Positions the image at the center with the entire image enlarged. |
Displayed only during PC signal input. |
|
Just |
Displays the input image in the actual size. |
|
|
Full |
Fills the entire screen with the image with the size (aspect) of the input image ignored. |
|
This item is grayed out and cannot be adjusted when there is no signal, signal is out of range, or during 3D or 4K input.
Press the [MENU] button to exit
Example of input image and screen size
HDMI Signal Input
PC Signal Input