
Recording |
Checking for Overexposed Areas (ZEBRA) |
During video recording, diagonal lines (zebra pattern) are displayed only at areas with the specified luminance levels.
- 1
- 2
- 3
- 4
- 5

Select the Manual recording mode.
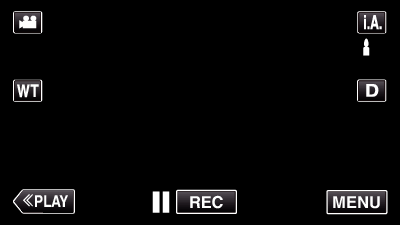
If the mode is ![]() Intelligent Auto, tap
Intelligent Auto, tap ![]() on the recording screen to display the mode switching screen.
on the recording screen to display the mode switching screen.
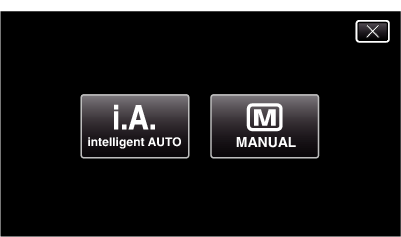
Tap ![]() to switch the recording mode to Manual.
to switch the recording mode to Manual.

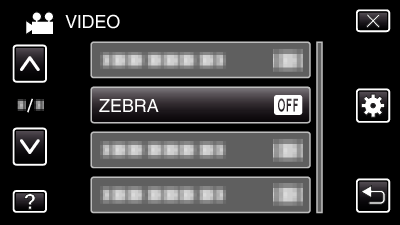
Tap “MENU”.
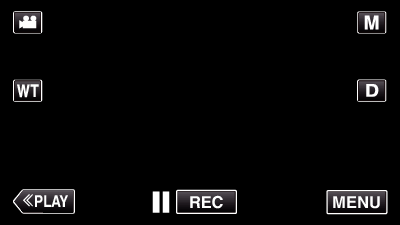
The shortcut menu appears.

Tap “MENU” in the shortcut menu.
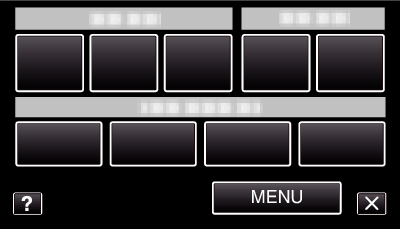

Tap “ZEBRA”.
Tap  or
or  to move upward or downward for more selection.
Tap ![]() to exit the menu.
to exit the menu.
Tap ![]() to return to the previous screen.
to return to the previous screen.

Tap “70-80%” or “OVER100%”.
| Setting | Details |
|---|---|
|
OFF |
Deactivates the function. |
|
70-80% |
Sections that are close to be overexposed are displayed in striped pattern. |
|
OVER100% |
Sections that are overexposed are displayed in striped pattern. |