
Using Wi-Fi |
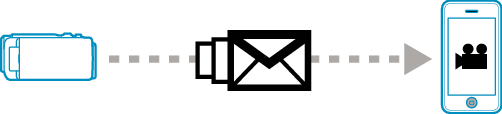
Record and Send Videos via E-mail (VIDEO MAIL ATTN.) |
Videos of up to 15 seconds can be recorded and sent via e-mail.
With this function, short videos can be delivered easily even on a daily basis, such as to show the growing up of small children to their distant grandparents.
Memo
- Specifications of the videos sent via video mail are as follows:
System: MP4
Video:
- H.264/MPEG-4 AVC baseline profile codec
- 640 x 360 resolution
- 30p frame rate
- 1 Mbps bit rate
Audio:
- Advanced Audio Coding (AAC) system
- 48 kHz sampling rate
- 16 bit
- 2 channels
Caution
- Be careful not to cause too much sending of e-mails. Depending on the internet provider that provides the e-mail service, the e-mails may be marked as spam or the usage limited may be exceeded.
Be sure to check the terms of the internet provider in advance to find out if there are any restrictions on the number or size of e-mails that can be sent. - When setting another person as the recipient, be sure to obtain his/her consent in advance.
- Depending on the e-mail service provider, the sending of video mail may not be supported.
- Too much usage may cause high communication fees to be incurred, and there may be a limit to the volume of communication. For more details, please check your Internet or smartphone subscription.
- JVC will not be responsible for any trouble that occurs upon the sending of mails.
- Videos captured via video mail are not saved to the camera or SD card.
- Videos that have already been captured cannot be sent.
What You Need
Wireless LAN router (use a product that has a Wi-Fi certification logo)
Internet connection
Account for sending e-mails (Supports SMTP. E-mail services that is only accessible from the web cannot be used.)
Necessary Settings
To send e-mails, the following settings are required.
*The above settings are not necessary if they have already been set for other functions.
Registering an access point
Setting the account for sending e-mails
Registering the recipient’s e-mail address
Selecting the Recipient’s E-mail Address
- 1
- 2
- 3
- 4

Tap “MENU”.
(Operation on this camera)
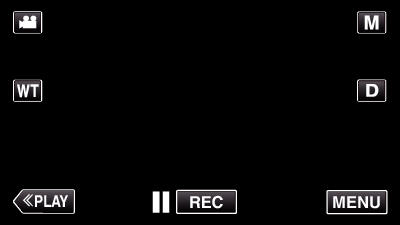
The shortcut menu appears.

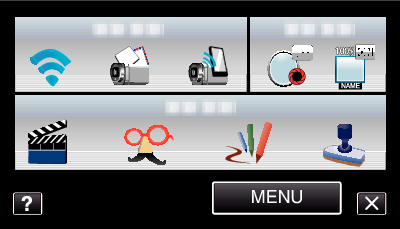
Tap “Wi-Fi” (  ) in the shortcut menu.
(Operation on this camera)

Tap “VIDEO MAIL ATTN.”.
(Operation on this camera)


Tap the e-mail address to be set as recipient.
(Operation on this camera)
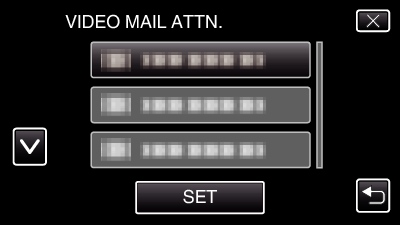
An icon ![]() appears beside the recipient’s e-mail address.
appears beside the recipient’s e-mail address.
After setting, tap “SET”.
Settings will not be saved until “SET” is tapped.
Operation Method
- 1
- 2
- 3
- 4
Tap “MENU”.
(Operation on this camera)
The shortcut menu appears.
Tap “VIDEO MAIL” (  ) in the shortcut menu.
(Operation on this camera)
Start recording.
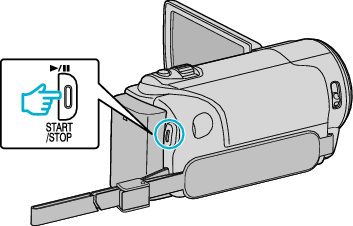
Recording starts after the countdown (5 seconds).
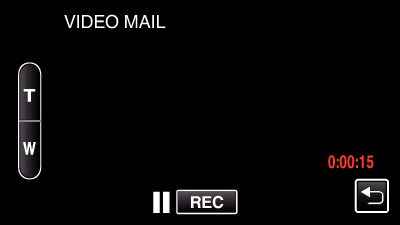
You can allow the recording to be performed for 15 seconds or press the START/STOP button to stop.
Tap “SEND”.
(Operation on this camera)
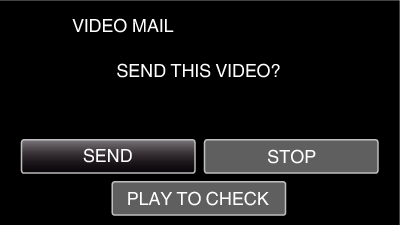
Sending of the video mail starts.
To check the file, tap “PLAY TO CHECK”.
When it is complete, tap “OK”.