
Using Wi-Fi |
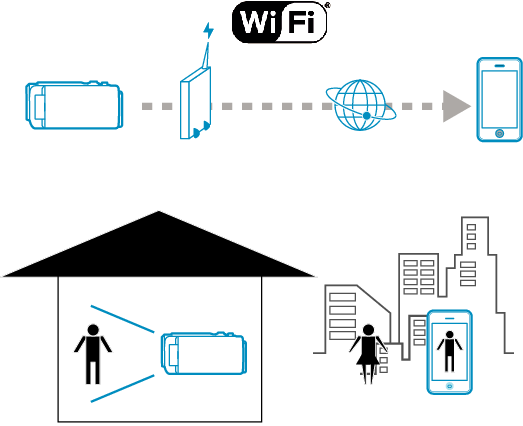
Image Monitoring via the Internet (OUTSIDE MONITORING) |
You can check the image on the camera via internet connection with a smartphone (or computer).
*Connection to the internet is established via a wireless LAN router.
Recording of videos and still images may be performed while monitoring.
Caution
- Too much usage may cause high communication fees to be incurred, and there may be a limit to the volume of communication. For more details, please check your Internet or smartphone subscription.
- If the network connection is slow, video images may appear jumpy, or audio sound may be interrupted or delayed.
- This function is not designed for disaster or crime prevention.
- To prevent the situation of forgetting to turn off the power, this unit will turn off automatically after 10 days of continuous usage.
- When not monitoring from a smartphone (or computer), the focus of the camera is fixed.
- Recording stops when the smartphone (or computer) is disconnected.
- Even when monitoring from a smartphone (or computer), the focus of the camera will be fixed if not operated for more than 3 hours. (Focus works again when the camera is operated.)
- To monitor images while you are out, make sure in advance that you can establish a connection via the Internet by entering the URL (WAN) displayed in “Network Information”.
However, you cannot monitor (operate) in the same way as while you are out when your smartphone (or computer) is connected to a home network via Wi-Fi. - You are recommended to change your password periodically. Also, avoid using easily guessable passwords, such as birth dates.
- There is no guarantee that the operations will work with all computer environments. For example, the video download feature of mobile safari browser, etc. is not supported.
Setting Multiple Cameras in the Same Network
- When UPnP is in use, cameras that are connected to the network later will be connected via the internet.
- To set up multiple cameras, you need to fix the IP address for each of the cameras (configure the LAN settings of the access point manually). In addition, it is also necessary to perform settings of the wireless LAN router in use manually. (For setting details, refer to the instruction manual of the wireless LAN router in use.)
Take note of the following.
What You Need
Smartphone or Windows computer
Wireless LAN router that supports UPnP (use a product that has a Wi-Fi certification logo)
To check whether UPnP is supported, please refer to the instruction manual of the wireless LAN router in use.
Internet connection with an obtainable global IP address
Memo
- Depending on the wireless LAN router in use and signal strength, you may experience connection problems or slow connections.
Necessary Settings
To operate, it is necessary to connect the camera to the internet via an access point (UPnP compatible wireless LAN router) in the house. As such, the following settings are required.
*The above settings are not necessary if they have already been set for other functions.
Registering an access point
Obtaining a dynamic DNS account
Setting the account on this camera
Caution
- Even if registration is done correctly to the camera, access may be temporarily unavailable such as when the dynamic DNS server is down.
To check whether the dynamic DNS server is working properly, access and check the DDNS server with a computer, etc.
Operation Method
Smartphone (Android / iPhone)
Memo
- It is necessary to install the application on the smartphone.
- 1
- 2
- 3
- 4
- 5
- 6
- 7
- 8

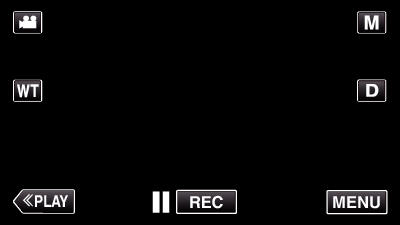
Tap “MENU”.
(Operation on this camera)
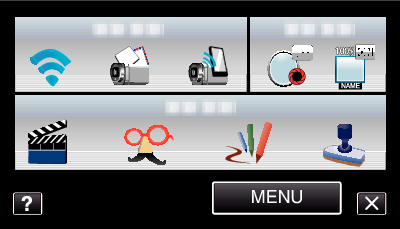
The shortcut menu appears.

Tap “Wi-Fi” (  ) in the shortcut menu.
(Operation on this camera)

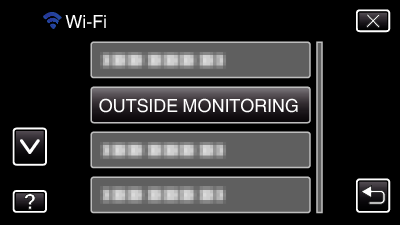
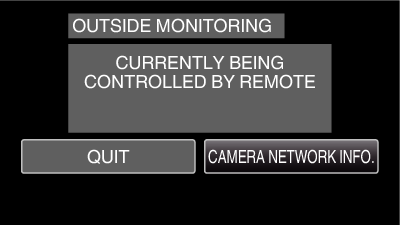
Tap “OUTSIDE MONITORING”.
(Operation on this camera)

Tap “CAMERA NETWORK INFO.”.
(Operation on this camera)
The URL (WAN) for the smartphone to connect to appears.
(Does not appear if DDNS is not set or set incorrectly.)
[ ![]() UPnP] is displayed when UPnP cannot be used.
UPnP] is displayed when UPnP cannot be used.

Check the URL (WAN).
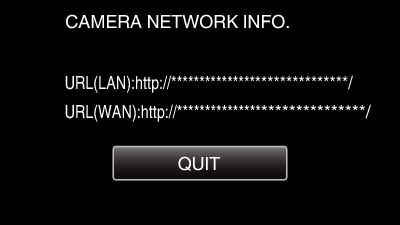
After checking the URL, tap “QUIT” to return to the previous screen.

Start “Everio Sync.” on the smartphone.


Enter the confirmed URL (WAN) directly.

Log in with your username and password.
(if authentication cannot be achieved)
The username is “everio” and the default password is “0000”.
Using smartphone applications
To end operations, tap “STOP”.
Computer (Windows 7)
- 1
- 2
- 3
- 4
- 5
- 6
- 7
Tap “MENU”.
(Operation on this camera)
The shortcut menu appears.
Tap “Wi-Fi” ( ) in the shortcut menu.
(Operation on this camera)
Tap “OUTSIDE MONITORING”.
(Operation on this camera)
Tap “CAMERA NETWORK INFO.”.
(Operation on this camera)
The URL (WAN) for the computer to connect to appears.
(Does not appear if DDNS is not set or set incorrectly.)
Check the URL (WAN).
After checking the URL, tap “QUIT” to return to the previous screen.
Start Internet Explorer (web browser) on the computer and enter the URL.
Log in with your username and password.
The username is “everio” and the default password is “0000”.
Using the Wi-Fi function from the web browser
To end operations, tap “STOP”.