The screen size of the projected image can be adjusted optimally according to the original screen size (aspect) that has been input.
-
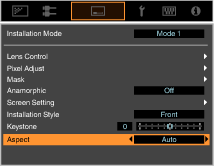
Press the [MENU] button to display the menu
-
Select “Installation”
 “Aspect” in the menu, then select the setting and press [OK]
 -
Press the [MENU] button to exit
|
Setting |
Description |
|---|---|
|
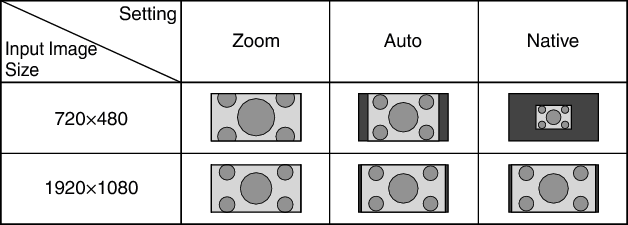
Zoom |
Magnifies the input image horizontally to the maximum while maintaining its aspect ratio for display. Displayed in a width of 3840 pixels when in the 3D mode. |
|
Auto |
Magnifies the input image horizontally or vertically to the maximum while maintaining its aspect ratio for display. |
|
Native |
Any image below 1920x1080 and 2048x1080 will be scaled 4 times the native resolution of the source. |
When “Picture Mode” is configured to “FILMMAKER MODE”, “Aspect” is fixed at “Auto”.
Example of input image and screen size