
Main Page>
Copying> Creating Discs with a DVD Writer or External Blu-ray Drive> Preparing an External Blu-ray Drive
Copying |
Preparing an External Blu-ray Drive |
Memo
- Mini-A (Male) – A (Female)
(Part number: QAM0852-001)
When connecting to the external Blu-ray drive, use a USB cable with Mini-A (Male) – B (Male) connectors.
The USB cable bundled with this camera cannot be used.
To use the USB cable provided with the external Blu-ray drive, purchase the USB extension cable.
- 1
- 2
- 3

Close the LCD monitor and connect.
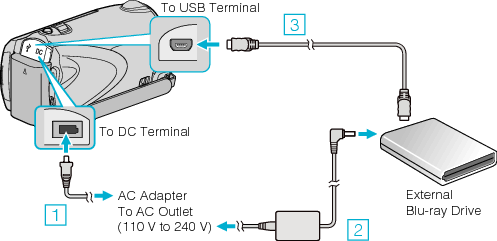

Connect the AC adapter to this unit.

Connect the AC adapter of the external Blu-ray drive.

Connect the USB cable of the external Blu-ray drive to this unit.
Refer also to the instruction manual of the external Blu-ray drive.

Insert a new disc.
Press the power button on the external Blu-ray drive to turn on the power.
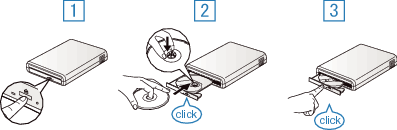
Press the eject button to open the disc tray.
Pull out the tray completely and load a new disc properly.
Push the disc tray in until it clicks into place.

Open the LCD monitor.

This unit turns on and the BACK-UP menu appears.
While the USB cable is connected, the BACK-UP menu is displayed.
Caution
- Be sure to turn off the power when connecting the devices.
Otherwise, electric shocks or malfunctions may occur.