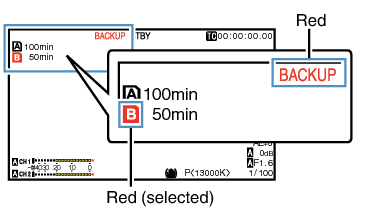
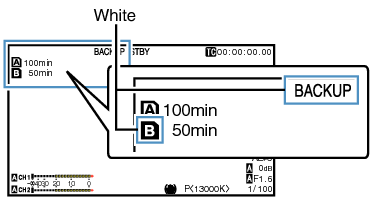
“BACKUP” appears on the display screen.
Backup Rec
TOPThe Backup Rec mode allows you to make use of the media in slot B for backup recording by controlling the starting and stopping of recording in slot B without using the [REC] button.
Start or stop the recording using [Main Menu]  [System] [Record Set] [Slot Mode] [Backup Rec] or press the user button that is assigned with “Backup Trig”.
Memo
During the Backup Rec mode (when [Slot Mode] is set to “Backup”), you can control recording to the 2 slots at different timings, and backup recording can only be performed on this camera recorder.
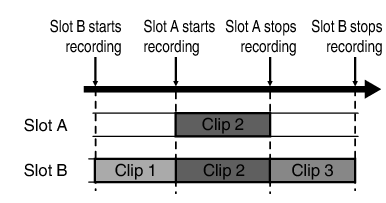
You can record without worrying about missing the important scenes by setting slot B to be always recording (backup recording) and using the [REC] button to start/stop recording of only the required scenes in slot A.
It is recommended to use a media with high capacity in slot B.
Set [Main Menu] [System] [Record Set] [Slot Mode] to “Backup”.
[System] [Record Set] [Slot Mode] to “Backup”.
Start backup recording. (Backup recording into slot B)
Select “REC” in [Main Menu] [System] [Record Set] [Slot Mode] [Backup Rec] and press the Set button (  ).
).
You can also press the user button that is assigned with “Backup Trig”.
Backup recording into slot B starts. (The characters “BACKUP” appear in red.)
The card slot mark of slot B turns red (selected state), and the status indicator of slot B also blinks in red.
Start normal recording (normal recording into slot A)
Press any of the [REC] buttons.
Recording into the media in slot A starts.
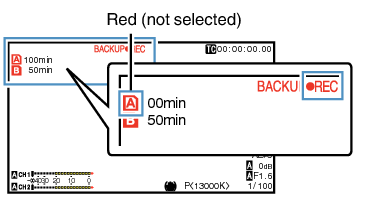
(The characters “ REC” appear in red.)
The card icon of slot A turns red (unselected state), and the status indicator of slot A blinks in red.
Stop normal recording.
Press any of the [REC] buttons again.
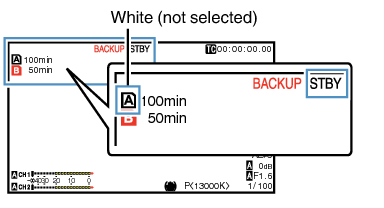
Recording to slot A stops, and the card slot mark of slot A turns white (unselected state).
The characters “ REC” (red) changes back to “STBY” (white).
The status indicator of slot A goes out.
Stop backup recording.
Select [STBY] in [Main Menu] [System] [Record Set] [Slot Mode] [Backup Rec] and press the Set button ( ).
You can also press the user button that is assigned with “Backup Trig”.
Recording to slot B stops, and the card slot mark of slot B turns white (unselected state).
The characters “BACKUP” changes back to white.
The status indicator of slot B lights up in green.
Memo
During backup recording, if the space of one card runs out, recording stops only for the card that is full.
When recording to both slots is stopped, recording in the Regen mode will be enabled for the card slot in which recording started.
When recording is started in the other slot while recording to one slot, the clip being recorded is split and simultaneous recording to the other card starts.
When recording is stopped for either slot A or B while recording to both slots, the clip on the slot which is still recording is split.
Although the clips are separated during recording the clips can be seamlessly joined by arranging them on the timeline of the editing software since they are recorded seamlessly.
Clip Cutter Trig cannot be performed during backup recording.
When [Slot Mode] is set to “Backup”, [Rec Mode] can only be set to “Normal”.