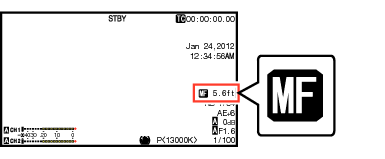
The manual focus icon  appears on the screen.
Focus Operation
TOPAdjusting Focus Manually

Set the [FOCUS AUTO/MANU/∞] switch to “MANU”.
Memo
If [Main Menu]  [LCD/VF] [Display Settings] [Focus] is set to “Off”, the icon will not appear.
Turn the focus ring to adjust the focus.
Memo
Using the Focus Assist or Expanded Focus function makes it easier to focus.
Pressing the [FOCUS AUTO] button in the Manual Focus mode activates the One-push Auto Focus mode, while holding down the [FOCUS AUTO] button activates the Push Auto Focus mode.
Adjusting Focus Automatically
Set the [FOCUS AUTO/MANU/∞] switch to “AUTO”.
The auto focus icon  appears on the screen.
Memo
If [Main Menu] [Camera Function] [AF Assist] is set to “Area” or “Far/Near”, you can turn the focus ring to shift the auto focus point while in the automatic focus adjustment mode.
If [Main Menu] [LCD/VF] [Display Settings] [Focus] is set to “Off”, the auto focus icon will not appear.
One Push Auto Focus
While in the Manual Focus mode, pressing the [PUSH AUTO] button (within 1 minute) makes the camera recorder focus on the center of the frame automatically.
Memo
Face detection does not work during One Push Auto Focus.
AF Assist does not function.
When the operation is complete, the camera recorder returns to the Manual Focus mode automatically.
One Push Auto Focus functions with emphasis on the focusing speed. This function is not suitable during recording.
Setting to Auto Focus Temporarily
(Push Auto Focus)
The camera recorder will shift to Auto Focus mode temporarily and automatically adjusts focus when the [PUSH AUTO] button is pressed during shooting in Manual Focus mode.
Release the [PUSH AUTO] button to return to Manual Focus mode.
Memo
Face detection does not work during Push Auto Focus.
Adjusting Focus on Far Objects
Slide the [FOCUS AUTO/MANU/∞] switch to “∞”.
The ∞ icon is displayed.
Release your finger to return to Manual Focus mode.
AF Assist Function
To shift the auto focus point during Auto Focus (AF), you can turn the focus ring to set the point to the left, center, right, or near and far directions.
Set [Main Menu] [Camera Function] [AF Assist].
Area:
Selecting this option displays the  icon in the area.
Turning the focus ring during AF displays the focus area on the left, center, and right side for about 2 seconds. Turning the focus ring within 2 seconds allows you to move the orange frame to select the focus area.
After selecting the area, focus is automatically adjusted to a focus point near the selected area.
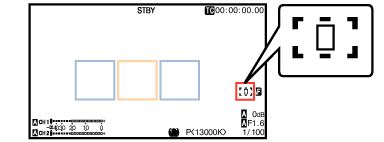
The icons (  , , and
  ) change in conjunction with the orange frame in the focus area.
Memo
When [Face Detect] is set, “Area” is not selectable.
Far/Near:
This option allows you to shift the auto focus point to near and far directions by turning the focus ring during AF.
Focus is automatically adjusted to a focus point near the position where the focus ring stops turning.
Focus Assist Function
When the [FOCUS ASSIST/1] button is pressed during shooting, the focused area is displayed in color. This enables easy and accurate focusing.
Select the color (blue, red or green) in the menu.
Memo
When [Main Menu] [LCD/VF] [Shooting Assist] [Focus Assist] [Type] is set to “ACCU-Focus”, the depth of field becomes shallower to enable easier focusing.
The “ACCU-Focus” function switches automatically to “Off” after about 10 seconds.
Select the display color in [Main Menu] [LCD/VF] [Shooting Assist] [Focus Assist] [Color].
If you use the zebra function and the Focus Assist function at the same time, it may be difficult to see the effect of the Focus Assist. In this case, turn off the zebra function.
Setting Focus Assist Function to a User Button
You can assign the “Focus Assist” function to a user button.
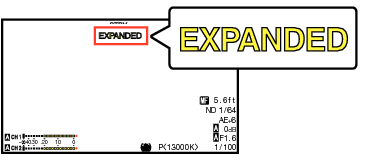
Expanded Focus Function
Magnifies the image at the center. Doing so enables precise focus to be established easily.
Assign the “Expanded Focus” function to any of the user buttons.
Press the user button that is assigned with the “Expanded Focus” function.
[EXPANDED] (yellow) appears on the screen, and the center portion of the image is magnified.
Pressing the user button again restores the image to the original size.
Memo
To set the operation when the button is pressed, go to [Main Menu] [Camera Function] [User Switch Set] [Expanded Focus].
This function can be used together with the Focus Assist function.
The magnification ratio varies with the format of the record signals.
Magnifying an image does not alter the size of the recorded image.
This function is unavailable when [Main Menu] [System] [Record Set] [Record Format] [System] is set to “SD”.